Tuesday, August 31, 2010

Pancake Napoleon!


Last week when I made chocolate pancakes, my husband used them to make desert one night, a pancake napoleon.

He took a pancake, smeared some marshmallow fluff on it, topped it with another pancake, whipped cream and crushed graham cracker crumbs. He also drizzled chocolate syrup over his treat.

It looked pretty tasty and he seemed to enjoy it!

It's always fun to come up with different ways to use the food you make.

Monday, August 30, 2010

Chicken and Stuffing...simple but tasty!


One of my favorite shows on TV is Food Network's "Chopped." If you haven't seen it - it's an elimination competition where 4 chefs are each given a mystery basket and they have to use every ingredient inside in some way while having access to a full pantry as well. In each round, the worst dish gets chopped. It's very interesting to see how a chef will incorporate a basket full of beef, almond butter and watermelon into a recipe. And that is a relatively tame basket! A lot of times there are the most random foods in there that are expected to throw the chefs for a loop. Only the most savvy chef will prevail!

Anyway, I am no where near the level that these chefs cook at, obviously. If someone handed me jicama, I would have no idea what to do with it. But my challenge is when I have a bunch of food in the house, but no set meal, and I need to figure out what I can combine to make something.

I faced that challenge the other day - we had a lot of chicken in the house, so I wanted to use that. We had various soups, rices, stuffing, pasta, etc. So I scoured the Internet again for ideas.

I found a very basic chicken and stuffing recipe that was quick enough to make and seemed tasty. So here are the ingredients:

1 (6 ounce) package of chicken-flavored stuffing mix, or any flavor you like.
6 chicken breasts (boneless and skinless)
1 can cream of chicken soup, undiluted
1/3 cup milk
1 tablespoon of parsley flakes


I ended up about 3/4 the box of stuffing and 4 chicken breasts because we didn't need as much food. I left the rest of the ingredients the same. And I also added a teaspoon of crushed red pepper flakes for a little something extra.

Directions:

Prepare stuffing according to package directions.

Once the stuffing is cooked, grease whatever baking dish you are using based on the amount of chicken you have and spoon the stuffing directly down the middle of the dish.

Arrange the chicken around the stuffing.


Combine the rest of the ingredients (soup, milk, spices) in a bowl and mix until smooth.


Pour the mixture over the chicken and some of the stuffing.


Cover and bake at 400 degrees F for 20 minutes. Uncover and bake 10-15 minutes longer or until chicken juices run clear.

Serve with your favorite vegetable!

It's very basic and simple but it turned out to be very tasty and both my husband and I enjoyed it. Since it didn't take long to make, it's great for after work.

Friday, August 27, 2010

Stir Fry Sounds Good To Me!


Chinese food is one of my favorite things to eat. A lot of Asian food is actually - the flavors are savory and delicious. So one of the first things I learned to make on my own was stir fry. It's very simple, and if you have all your ingredients chopped ahead of time, you can easily throw it together for a nice meal after work in under 20 minutes.

Personally I'd rather use sliced pieces of chicken over beef, but everyone has their favorite tastes. Here are some of my other favorite ingredients:
Udon noodles
Water chestnuts
Bamboo shoots
Snow Peas
Mushrooms
Onion
Pepper
Cashews

Sometimes I use all ingredients, other times, just what I have on hand. I know fresh mushrooms are best but I am partial to the sliced mushrooms that come from a can. I also use the water chestnuts and bamboo shoots that are in cans often found in the Asian section of your local supermarket.

I always cook the udon noodles like spaghetti first in boiling water, then add it to the stir fry at the very end with the sauce. Or, I just put the udon noodles on the plate and pile stir fry on top!! Depends on my mood, I guess.

Here are 2 of my favorite stir fry sauce recipes:

Soy-Teriyaki Sauce
1/4 cup chicken broth
1/4 cup soy sauce
1/4 cup teriyaki sauce
1 teaspoon red hot pepper flakes
1 teaspoon sugar

Mix all together and pour over cooked ingredients in skillet or wok.

Sweet n Sour Sauce
1/4 cup chicken broth
1 tablespoon soy sauce
1 tablespoon of either rice wine vinegar, balsamic vinegar or cider vinegar
1 tablespoon brown sugar
1/2 teaspoon red pepper flakes

Mix all together and pour over cooked ingredients in skillet or wok.

Enjoy!

Thursday, August 26, 2010

Eating With A Travels...to Edinburgh, Scotland!!


Back in 2001 I had my first experience overseas abroad to Europe. I'd been "abroad" before, but I don't count Canada and Mexico as much - probably because they are connected to the US and I never went far.

So in 2001 I studied abroad in London for a summer session. Despite picking a location where I would be able to understand what they were saying, I was still very culture shocked. It was a rough first week and a half as I struggled to adjust but the weekend trip I got pulled into for Edinburgh, Scotland was a game changer. Several of my "flat mates" decided to hop a train and go and somehow, non-spontaneous me, went along with it as well, despite not having a set hotel reservation. (That thought scared the crap out of me...I hadn't had much hostel experience yet!)

Anyway, we get to Edinburgh and we get a hotel - I was instantly happier. Exploring the city was great, it is beautiful and it remains one of my favorite cities in the whole world to this day.

One adventure, however, was the morning we decided to go to the World's End Pub for a "traditional Scottish breakfast." We had gone to that pub the prior evening for some drinks (and also discovered the whiskey-flavored condom dispenser in the bathroom...only in Scotland!) One of the girls I was with noticed a sign in the corner for the traditional breakfast and stated we should go back in the morning. We didn't really know what we were in for but it sounded good so there we were!

We had already heard a lot of "haggis" jokes along our travels in Edinburgh. The locals like to tease the tourists about their famous dish. They kept telling us to try the haggis but would never, ever tell us what it was. Suuure...that makes me want to try it!! (This was also before we all had cell phones with Internet on it so we really were clueless).

So anyway, our breakfast platter arrives. There were eggs, two different forms of potatoes, toast, oatmeal, bacon, sausage, vegetables, milks, creams, teas, Scottish jams and preserves and orange juice. Lastly was the haggis, sitting there in all its haggis glory.

It was a grainy little brown cake, and we still had no idea what it really was. I remember my friend Joscelynn trying it first or second and stating it tasted like meatloaf. Slowly everyone started trying some of it, and even picky little me took a small fork-full. It did actually taste like meatloaf.


It was not until all 5 of us had tried a bite of the haggis that the waiter told us what this delicacy was. To paraphrase, "haggis is a dish containing the sheep's 'pluck' (heart, liver and lungs), minced with onion, oatmeal, beef fat, spices, and salt. It is also mixed with stock and traditionally simmered in the animal's stomach for a few hours." However, modern haggis is prepared in a casing rather than an actual stomach. OH, thank you for THAT.

Well, needless to say, a few of us were pretty grossed out and upset about the description. I honestly don't know how I managed to finish eat the rest of my delicious breakfast but I did. At least I can say that I tried it, though I still shudder at the memory sometimes. I guess when you are young and don't have much experience abroad, something as unusual as that would freak you out a bit.

At least it was an experience. Scotland is also where I truly learned to drink tea the way they do in Great Britain - with milk and sugar. My first fried Mars bar was also consumed there. All in all, it's a great place to go and there are a lot of fun pubs to drink and eat at. Our favorite's were the World's End and Frankenstein's Pub.

But try the haggis at your own risk...

Tuesday, August 24, 2010

Chocolate Pancakes!!


Two words...chocolate pancakes. Uh, YUM!!

Everyone loves pancakes and everyone loves chocolate and this recipe was deeeeeelicious!! My old camp buddy has a website called Somewhere In Middle America where she mainly talks about things that inspire her in life... things going on in her life... and a lot of style! (Check her out, she's fun to read, plus at her website you will also find a link to her own stationary company and another website she writes for, EAD Living). Anyway, on Friday's she tends to post links of things she found around the Internet that she thinks is cool. One of those posting's happened to be for CHOCOLATE PANCAKES!!

As soon as I saw this I knew I had to make them. So here is the recipe:

Ingredients:

* 1 cup sugar
* 1 1/4 cup flour
* 1/3 cup unsweetened cocoa powder
* 1 t. baking powder
* 1/4 t. baking soda
* 1/4 t. salt
* 3/4 cup milk
* 2 eggs
* 1 t. vanilla
* 2 T oil

Directions:

1. Mix all of the dry ingredients into a medium bowl, preferably one with a pour spout if you have one.


2. Measure your milk into a large measuring cup first, then add the rest of the wet ingredients to it.


3. Whisk the wet stuff with a fork to blend it well.

4. Pour into the dry mix and stir it all up until there are no lumps in the batter.


** If your batter seems too thick, add a splash more milk. If too thin, add a little more flour.

Just like regular pancakes, heat up a flat skillet or griddle on medium heat. Drop small circles of batter on the surface and watch them expand!


When regular pancakes bubble up, they have clear bubbles and they turn brownish. But these pancakes are already brown so watch carefully and be sure not to burn them.

As soon as they just begin to bubble, slide the spatula underneath one to flip it over If it sticks, pull it back and wait a little longer. If you can get the spatula under the pancake, go ahead and flip it. It may take a few tries to get it right.

I burned a few before I got the feeling of how long it took a pancake to cook on the first side before flipping it.

After I made a nice batch of regular pancakes, I threw some white chocolate chips into the batter for an extra treat!!


My husband views these pancakes solely as a dessert like item. For me? Please. I'll eat them any time of day... breakfast, lunch, dinner, snack. I'm not picky!

The day I made them, however, I did eat them as dessert with some powdered sugar on them. But one day I'll probably find myself eating the leftovers as breakfast!!

Enjoy!

Recipe originally courtesy of GoodMeasureBlog.com

Sunday, August 22, 2010

Stuffed Chicken Breasts with Wine Sauce!


And I am back on the bandwagon!! After a few baking mishaps that left me disappointed in my work, I successfully cooked dinner for my husband and I that tasted amazing. I am so proud of it!!

At first I didn't know what to make and I posted my dilemma on my Facebook page (Eating With A). Someone suggested these wonderful sounding Chipotle Chicken Rolls and I am excited to try them but since I don't eat spicy food that often, I think I will save that recipe for the next time we host a party so I can try a little but not waste the food if it is too spicy for me.

So I thought and thought and searched the Internet for ANYTHING to inspire me. I knew I had to use chicken...we have so much in the house right now. So after reading about 100 recipes, I finally came up with a mish-mosh of ideas and went downstairs to test it out...

I came up with chicken breasts stuffed with ricotta cheese, spinach, Parmesan cheese and chopped black olives and topped with a wine sauce. Here are the ingredients and directions:

Ingredients:
6 large boneless skinless chicken breasts, 1/4 inch thick
1/2 cup thawed and drained frozen spinach
1/2 cup ricotta cheese
1/4 cup Parmesan cheese
1/4 cup black olives, chopped finely (optional)
salt and pepper to taste
1 large egg

For Sauce:
1 tablespoon butter
1 tablespoon flour
1/4 cup white wine (and another 1/8 cup white wine)
1/2 cup chicken broth (and another 1/4 cup chicken broth)

Steps:
I found making the stuffing for the chicken breasts first was the easiest...in a bowl, I mixed the ricotta cheese and Parmesan cheese, then mixed in the spinach and olives until well combined. Then in a separate bowl I whisked the egg and slowly poured it into the cheese mixture and mixed until completely absorbed into the mixture. After that, I sprinkled some salt and pepper into the mixture and stirred it in for a little extra taste.


Then I got the chicken and laid it on a plate. In the middle of each chicken breast, I spread the stuffing. Then I did the best I could to roll it up so the stuffing stayed inside. I solidified the rolled chicken with some toothpicks.

After all chicken was rolled, I put some olive oil in a skillet and put the chicken rolls inside. After cooking them on each side for 2 minutes, I lowered the heat and covered the skillet, letting it sit for 5-7 minutes to cook through. Then I took the chicken off the heat.


Now it was time for the wine sauce! In a large sauce pan, I put the butter and flour in and cooked that for a minute. I then whisked in 1/4 cup of wine until well blended, and then the remaining 1/8 cup of wine. I then let that reduce for a minute. Then I whisked in 1/2 cup of chicken broth and stirred until completely absorbed - then the remaining 1/4 cup broth.

I reduced the heat and put the chicken rolls into the wine sauce and let it simmer for about 7-10 minutes.


When ready to serve, remove the toothpicks and enjoy!!

This sounds complicated but it wasn't...the hardest part was learning to roll the chicken.

And the wine sauce is SO good that I can see using this on various chicken or fish dishes. It's simple to make and tastes so good!!

Try it out for yourself and see :-)

Sunday Sundae!


It's time for another yummy summer-time treat!!

Today's sundae I have named "Caramel Fudge Pretzel."

I used Bunny Tracks ice cream by Blue Bunny, caramel, whipped cream, chocolate syrup and broken pretzel pieces sprinkled on top!

My husband really enjoyed the salty and sweet factors together. Yum!

Wednesday, August 18, 2010

Baking is Just NOT my thing...


I really think I should just stick to cooking. I am much, much better with savory foods than with sweet foods, though I love cookies and cakes sooo much. Despite my cookie mishap last week, I had an unused graham cracker pie crust that would go bad this month if I didn't do something with it. So in sticking with my current love for all thing s'mores, I found a recipe for S'more Pie.

It should have been good! But it ended up turning into one gigantic mess and my kitchen was covered in chocolate, and the cake didn't do what it was supposed to do... here is my adventure...

I obviously cut out the part of the recipe where you make your own crust because I already had a store bought one. So I started in with the eggs, milk, cocoa powder, etc. It smelled good and seemed to be going well.


I seemed to have a lot more filling than I needed but I poured some of it into my crust and then tried to get it into the fridge to cool.


That was problem number one...the filling, which was very liquidy, spilled all over my floor and fridge... problem number two was that after an hour in the fridge, it was no thicker or congealed and only "froze" when transferred to the freezer.

My husband and I decided to keep it in the freezer, add the marshmallows the next night, broil it for 20 seconds and then eat a frozen slice with the toasted mallows.

We tasted it - the chocolate was fine. It did taste like chocolate pudding. It was just not as much fun to eat frozen and we only had a little bit and ended up tossing everything. I really wished I had somehow made a nice, smooth, creamy chocolate pie.

So I called my baking consultant down in DC once again and she informed me that I either had old cornstarch and it didn't thicken right or I needed to cut the recipe down a bit and I used too much milk.

I think I'll stick to just cooking for a while :-)

The full recipe is below...courtesy of Disney Family Fun website... (link above)

Ingredients

* 1 1/3 cups graham cracker crumbs
* 1 1/4 cups sugar
* 6 tablespoons butter, softened
* 4 egg yolks
* 1/4 cup cornstarch

* 6 tablespoons cocoa powder
* 1/4 teaspoon salt
* 3 cups milk
* 2 teaspoons vanilla extract
* 2 cups miniature marshmallows

Instructions

Heat the oven to 375º. In a mixing bowl, combine the graham cracker crumbs and 1/4 cup of the sugar. Add 4 tablespoons of the butter, rubbing it in with a pinching motion until evenly distributed. Press the crumb mixture into a 9-inch pie pan and bake for 8 to 10 minutes or until golden brown. Allow the crust to cool.

Beat the egg yolks in a medium bowl and set them aside. Combine the remaining cup of sugar, cornstarch, cocoa powder, and salt in a 2-quart saucepan. Set the pan over medium heat and gradually whisk in the milk, stirring until smooth. Bring the mixture to a boil, stirring often. Boil for 1 minute, stirring constantly, then remove the pan from the heat.

Whisk 1/2 cup of the hot chocolate mixture into the egg yolks. Repeat with 1 cup of the chocolate mixture, then return the chocolate and egg mixture to the saucepan. Boil over medium heat for 1 minute, stirring constantly.

Remove the pan from the heat and stir in the remaining 2 tablespoons of butter and the vanilla extract. Pour the filling into the pie shell and allow it to cool at least 15 minutes, or chill it in the refrigerator overnight.

Just before serving, heat the oven to broil. Cover the pie with the mini marshmallows and broil it on the uppermost rack for about 30 seconds or until the marshmallows are lightly browned. (Watch carefully, or the marshmallows will burn.) Serve warm or chilled. Serves 8.

Tuesday, August 17, 2010

Omelets! Breakfast, Lunch OR Dinner - You Can't Beat It!


I love omelets. I love them for how easy they are to make and how flexible they are as a dish both ingredient-wise and time of day-wise. I love them for how you can pair a lot of different sides with them. They are seriously just great. What I don't love is the spelling...is it omelet or omelette?? I never know and I found both on the Internet!

My husband does not like eggs...or he convinced himself that he doesn't. (I am convinced it is the latter). Just like hot dogs, it bothers the living daylight out of me that he won't and refuses to try them. After all, your taste buds change every 7 years or so and you find out you like things you thought you didn't!

I did get him to try a potato omelet in Barcelona when we were there this past spring and he *gasp* LIKED it. Or rather, he said it "wasn't bad." But he refuses to try my omelet creations...and with some of the ingredients I use, you don't even have an "eggy" taste!

Men.

But anyway, here is one of my favorite omelets to make - more for lunch or dinner because it has a stronger taste.

Ingredients:
2 eggs
oregano
chopped onion
feta cheese
pinch of black pepper
thawed frozen spinach
cooking spray or a dab of margarine/butter for the skillet

I crack the eggs into a bowl (if you are an egg white person, go with it...I use the whole egg) and whisk them. Then I mix in the spinach, feta cheese, onion, black pepper and oregano and whisk again.

I melt my margarine in the skillet and then pour in the egg mixture. Keep the stove on a medium heat so the omelet doesn't burn too fast. Once you see some firming on the top, flip it over to cook the other side for about 30-45 seconds (1 min max). The amount of oregano I use is to my taste. Only use what you feel comfortable with.

Put your omelet on a dish and enjoy!

This omelet definitely does not taste like egg at all, the oregano and feta cheese pretty much overpower that. But it is VERY tasty!!

Depending on what kind of omelet I make, I use an array of sides. Anything from hash browns to toast to fruit salads. Sometimes soup! It really just depends on my mood and how I've constructed the omelet.

Anyway, it is just such a great meal. Tell me what kind you like!

Sandwiches!


I love sandwiches. This is a funny statement coming from a girl who, throughout elementary and middle school, ate the bread, cheese and meat all separate because I didn't like the breadcrumbs getting on everything. I don't know what I was thinking!!

My love for sandwiches started through my sleepaway camp, actually. There was a gas station down the road called Texaco and they had a small deli inside the store. It was a bunk treat to get Texaco sandwiches on any given day...usually it was because someone in your bunk had a birthday. (I was very lucky in the fact that the bunk I was put into had several July birthdays!) So anyway, at age 11, someone in my bunk had a birthday and Texaco was for lunch...I had to suck it up and get a sandwich.

Maybe it was being at camp for a few weeks with sub-par food, maybe Texaco put drugs in the ingredients, I don't know, but that sandwich was honestly the BEST sandwich I had ever eaten. And it was just turkey, cheese and lettuce!! And there my love for the sandwich grew. I looked forward to Texaco at camp so I could try new concoctions. I started ordering deli sandwiches with my dad when I was at home. My mom was relieved that I would finally bring a normal sandwich to school. Life was good.

It wasn't until college though, that I started experimenting more with what you can put on a sandwich and using different condiments. I never really was a mustard fan and avoided anything that the name. But now I openly use honey mustard and honey dijon mustard. Sometimes I use a smear of mayo. Sometimes I use hummus as the condiment! The possibilities are endless.

Now I really enjoy the days my husband and I make sandwiches for lunch because I get to be creative. In fact, I have come up with my "signature" sandwich that we always use as a fall-back.

Here is A's Signature Sandwich:

Hard Salami
Turkey Breast
lettuce
pepper slices - the red, orange or yellow peppers taste the best
feta cheese
swiss cheese
honey dijon
tomato

YUMMY! I like using whole wheat club rolls. First I use a few slices of the hard salami, followed by a little turkey. Lettuce and pepper slices come next, followed by just a few crumbles of feta cheese for a little zing of a taste. Swiss cheese is next (and tomato if you like them - I don't but my husband does). The honey dijon goes on the top piece of bread. There are times I will toast the roll or bread just for something a little extra.

Another sandwich I really enjoy making is the Thanksgiving Sandwich. Leftover carved pieces of turkey are placed in a roll or wrap along with stuffing and dried cranberries. Make sure it is heated for a really homey, hearty meal.

Of course, pickles accompany almost every sandwich that comes out of this house, and sour pickles are our favorite!

What is your favorite sandwich??

Sunday, August 15, 2010

Potato Crusted Eggplant


I like buying eggplant to use for dinners because it is often very inexpensive (at least where I live) and goes on sale a lot. But I find making eggplant parmesan all the time boring...which is how I found the recipe for my eggplant patties.

In my quest to find eggplant recipes that are different from eggplant parm or eating it steamed or plain or whatnot, I came across a recipe called Tater-Dipped Eggplant. It seemed different...and interesting...and not like my usual eggplant patties so I decided to give it a go.

My husband and I really, really, really enjoyed it!

I did futz with the recipe to make it more "my own" but the basic principle was still there. The whole process probably took about 45 minutes - most of the beginning time was spent trying to peel the eggplant - something I had never done and had a lot of trouble with!!

Ingredients I used:
1/2 cup margarine (or butter)
1 medium eggplant, peeled and cut into 3/4 inch slices
1 egg
1/2 tablespoon milk
1 teaspoon salt
1/2 teaspoon pepper
1/2 teaspoon garlic powder
1/2 teaspoon paprika
1 cup instant mashed potato flakes
oregano
crushed red pepper flakes


Steps:

Preheat oven to 450 degrees F (220 degrees C).

Slice eggplant.

In a small bowl beat egg and pour in the milk...whisk until smooth. Add in salt, pepper, garlic powder and paprika - mix well until all ingredients are incorporated into the egg.

Dip slices of eggplant into egg mixture and then dip into potato flakes to coat. Lay eggplant slices on baking sheet for cooking.


While you are dipping and coating the eggplant (or just after), melt butter in small saucepan on stove on low heat. When melted down, pour a drop onto each slice of eggplant on the baking sheet.


** This step is optional. For a little more taste and zing, I sprinkled a small amount of oregano and crushed red pepper flakes on top of each eggplant slice. We like a lot of taste in this house but for people who prefer plainer foods, leave this out...or add a seasoning you like!!

Bake for about 20 minutes, or until tender and golden brown, turning over once after 10 minutes.


We ended up eating this as a side to some leftovers we brought home from an Italian restaurant, but it would make a great side to spaghetti as well. Or anything else you want some soft yet crispy eggplant as a side to.

To us, it wasn't really substantial enough to have as a meal alone, unless we each ate like, half of what I made!! So we preferred to use it as a side, but there are endless possibilities.

Enjoy!

Sunday Sundae!


Today's sundae is one I dubbed "The Black & White."

My husband wanted another Pop-Tart sundae so this time I used another Ice Cream Shoppe Pap-Tart called "Ice Cream Sandwich."

On top of the Pop-Tart I scooped fudge ripple ice cream and topped that with whipped cream and chocolate sauce.

For just an extra splash of color (and taste) I dripped some strawberry topping on the whipped cream and sprinkled black, white and purple sprinkles as a finished garnish.

Yum!

Saturday, August 14, 2010

Cookies Are Not my Friends...But I Love Them


So...this post is going to have 2 parts. First I am going to talk about the recipe I used the other day...then I will talk about my issue with cookies.

If you want a quick and easy cookie recipe, try cake mix cookies. Take a box of cake mix, throw it in a bowl and add 1/2 cup vegetable oil (or oil of your choosing), 2 tablespoons of water and 2 eggs. Mix it into a dough and until all ingredients are combined.

Scoop onto a cookie sheet and bake at 375 for about 10-12 minutes, or until you can insert a toothpick into the cookie and it comes out clean. If you regularly bake cookies, you will get a feel for how long it should take.

Once the cookies cool you can either leave them plain or dress them up with frosting and sprinkles.

The other day I used half a box of strawberry cake mix in an effort to use it up. I threw in some white chocolate chips to give it some flair. Everything should have been great!


I mixed up all the ingredients, used our fun little cookie dough scooper thing and put the cookie sheet into the oven.

About 10 minutes into baking, I check on the cookies and do the toothpick test - they were not quite done. So I put them back in and walk away for 3 minutes - only to return to incredibly burnt cookies. WTF?!?!

So into the garbage they went. I don't know what my problem is...I can bake cakes, cupcakes, muffins and brownies. I can cook dinner. But cookies - they are my NEMESIS. Every time I try to bake cookies, they burn. My husband bakes great cookies! I don't know how he can do it.

Sigh. So that was a wasted effort, and a waste of food. At least it was only half a box of leftover cake mix. Maybe next time I can do better. I know my friend called me right away after I texted her to tell her I burned my cookies to try and "teach" me how to bake them over the phone. I might need to take a trip down to DC in order to learn. :-)

Friday, August 13, 2010

Caramel Apple S'mores


Well, my husband and I tried another new s'mores combo from the Food Network Magazine. We loved the Cinnamon Toast S'mores so much that we just had to try another one. So we picked Caramel Apple S'mores.

This "recipe" called for apple slices (I chose green apple because that's my favorite), cinnamon graham crackers, marshmallows and chocolate caramel candy (aka something like a Rolo).


Once again I just cooked these in tin foil in the stove because I was too lazy to get the grill or our firepit going, just for this.

The first problem was stacking all the ingredients... I think I needed to make the apple slices thinner and flatter. Everything oozed out in the tin foil and we were left with a giant s'more mess!

The mess tasted good, but was hard to eat... caution try this one out at your own risk!

We're going to stick with original and cinnamon toast s'mores...but maybe I'll think of a new concoction on my own!

Wednesday, August 11, 2010

Eating With A Travels...to Japan!


Back in 2003, in the dead of winter, I traveled to Japan to visit one of my best friends who was living there to teach English to Japanese students. I was nervous to go for many reasons... this was the furthest I was ever flying by myself... I would be trapped on a plane for 14 hours...I don't speak a lick of Japanese... and most importantly, I hate fish, thus not eating sushi. What was I to do?

Well, I didn't need to fear - my friend had my back...for the most part. There WAS one dinner where she tricked me into eating octopus, something I am still not thrilled about (and yes, it was gross), but for the most part - she was kind. First of all, there are a lot of Japanese fast food places - but they are better than run of the mill McDonald's or Burger King. They make their burgers fresh - what a concept. So even though we frequented quite a few Mos Burger and Lotteria restaurants, the food was actually pretty good and I enjoyed it. Plus, it was definitely kinder to my wallet than always going to a sit down restaurant.

I am thankful for the first real dinner my friend took me to, for it was there that I tried one of my favorite snacks today - edamame. Before that winter in 2003, I never had the little green soybean, nor did I really have interest. Well, as soon as we sat down my friend asked for edamame, I think. Or else they just brought it. I can't remember that detail. But anyway, the dish full of bright green edamame arrived and my friend urged me to try one. I picked it up hesitantly... they were in their shell so it was fuzzy to the touch...and I really wasn't one for "health food" back then. But, I tried it. Chewing slowly, I still wasn't sure about the taste, but I kept eating. By the time I left Japan, 9 days later, I was an edamame pro and basically ordered it anytime I went to a Japanese restaurant back in the States. Today I force my husband into trying them and I think they are growing on him too, even though he likes to say he doesn't like them much. (Meanwhile, I put them in my quinoa cakes and he liked those just fine!) I love to buy edamame from Trader Joe's and bring it as a snack to work - it's easy to pack and they are filling and healthy little beans.

There were many other food experiences I had while in Japan. I ate some real Japanese tempura, which was excellent!! I was taken to an "Italian" restaurant and served pizza...which had mayonnaise on it. Talk about weird... it grew on my friend but it was a little too much for me - give me a real NY slice any day! I was taken to a few Izakaya's - this is a place where you basically keep ordering lots of small dishes while hanging out with a group of friends over several hours. I remember eating a lot of gyoza - Japanese for dumplings. They were amazing!! We also ordered sukiyaki (thinly sliced beef) and cooked it at our table.

Lastly, one place I fell in love with was Mr. Donuts. YUM! Japanese donuts are more chewy than the ones here in America...and definitely less sweet. But boy, are they delicious. If you ever find yourself in Japan, head there and check out some of the interesting flavors.

So my friend was able to give me a true Japanese experience, despite me not liking sushi. I know this is a common fear a lot of non-sushi eaters have about going to Japanese restaurants here in America or visiting the country. But there really is plenty to eat between dumplings, "fresh" fast food, tempura and mayonnaise filled pizza! (There ARE more foods than those 4 things, don't you worry).

And if you were anything like me, you'd come back to the US searching for Japanese grocery stores to find some of the yummy new foods you tried. I found one where I lived at the time and bought a HUGE bag of the gyoza dumplings. Though - I cooked them using a spatula...not with chopsticks like my friend made me do in Japan, where I promptly burned each one to a crisp because I had no idea how to cook using little sticks as tools. Leave that skill to the pros!!

Tuesday, August 10, 2010

A's Cheesy Rice and Chicken Stuffed Peppers!!


I am very, very, very excited about the recipe I am going to share with you... this is the first time I really felt like I could cook because I sort of made this up on my own.

Granted...I did take 2 recipes and modify them but I took elements of each and had to figure out new measurements on my own to make a dish. AND IT WORKED!!

Let me start at the beginning... my husband and I were at a Farmer's Market last weekend and saw these odd looking peppers. They were green and big like a bell pepper, but didn't look like a bell pepper. They were round and had ridges, almost like a little green pumpkin. I asked what they were...they are called "cheese peppers" (no real reason) and taste like a bell pepper. The woman then told me she liked this particular shape because they were really easy to make stuffed peppers with.


I was intrigued. I have never eaten a stuffed pepper in my life...and my husband really couldn't remember eating one either. We decided to buy the 3 for $1 and experiment. When I got home, I searched the Internet for stuffed pepper recipes. A lot of traditional recipes have tomato sauce and beef along with either rice or vegetables or whatever. But I came across one recipe that used ground turkey and no tomato sauce... and one that only used rice and cheese and was more vegetarian. I also found others using tofu or just vegetables but those two intrigued me the most.

So, I used their ideas but made my own. I used ground chicken, rice and cheese. (And a slew of other ingredients, but I'll get there). The result was seriously really, really good. My husband and I both fully enjoyed the recipe and I think this is going to become a regular in the household. TWO THUMBS UP!!

Here is what I used:
3 cheese peppers, tops and seeds removed
1/2 pound ground chicken
1 cup cooked rice (I used brown instant rice)
1 small onion, chopped
2.5 teaspoons minced garlic
2 tablespoons butter or margarine
1/2 teaspoon Italian seasoning
1/2 teaspoon salt
3/4 teaspoon black pepper
1 tablespoon flour
1/2 cup milk
1/2 cup chopped tomato
1/4 cup feta cheese
1/2 cup mozzarella cheese

Cook your rice and set aside.

In a large saucepan, cook peppers in boiling water for 3 minutes. Drain and rinse with cold water; set aside.

In skillet, cook onions, garlic and chicken until chicken is pink - drain and set aside.

In the same skillet, melt butter and stir in flour, salt, pepper and Italian seasoning until smooth. Add milk and bring to boil. Stir until thicker.

Put chicken mixture back in the skillet and add tomato, feta cheese and rice - heat for a few minutes.

Spoon into peppers and sprinkle with mozzarella cheese.


Place in greased baking dish and cover. Bake at 350 degrees F until peppers are tender and filling is hot - about 25 to 30 minutes.

The whole process took about an hour with all the chopping and cooking and baking. But it was so worth it!!

It's every easy to alter this recipe to use ingredients you like as well.

I also had leftover filling which we tried to bake as a "sloppy-joe" type burger. The filling was great on its own as well!!

Enjoy!

Simple Solutions...


So, I can't eat a lot of red sauce on pasta and stuff because the acidity in the tomatoes upsets my stomach. Therefore I usually use cheese sauce or Alfredo sauce or butter on my pasta.

Well, the other night I made garlic butter. I couldn't believe I hadn't thought to do this before. So easy, yet it was the first time I've made it! Anyway, I just took a small sauce pan and dropped in the amount of butter I needed for 2 people. While it was melting, I kept stirring in garlic powder so it wouldn't clump. It actually turned out really well and my husband, who LOVES red sauce, actually liked it a lot.

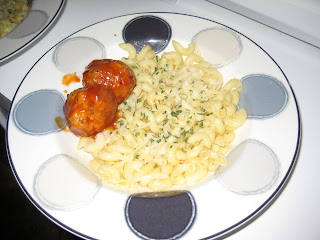
We ate it over elbow pasta, with a side of my sweat n sour meatballs!!

It's funny how something so simple is something you never thought to do.


Sunday, August 8, 2010

Churros With Chocolate


A few months ago my husband and I went on a cruise out of Barcelona and with the little bit of research I did on Barcelona before we went, the one thing that stood out to me was to eat some "Churros con Chocolate" (Churros with Chocolate.) Being a huge chocoholic, I immediately put that on my list and and knew to look out for places selling such a treat.

This dessert did not disappoint - it was fantastic. We had it after dinner our first night. The churros are fried dough with just a tiny bit of sugar on them - not like the cinnamon sugar ones that are sold in the US. They get served with a cup of steaming, thick hot chocolate and you dip the churros into the chocolate to eat them. OH MY GOD! It was seriously delicious.

I loved it so much that we had it as a snack again the next day before we went to the ship, and then at one of the stops on the cruise there was a place selling them so we ate some at 11:00 in the morning. One of my goals after coming back home was to make this dessert myself...and 4 months later I finally did.

The recipe is not particularly hard but it was a little messy and I had dishes everywhere. I am also thankful that my husband, despite being down an arm at the moment due to shoulder surgery, was able to help me out since there were many steps at once and I didn't want to burn anything. He manned the churros cooking in the oil while I mixed up the chocolate.

Here is the recipe I used:
Whatever oil you like to cook foods in - I used vegetable
1 cup water
1/2 cup margarine or butter
1/4 teaspoon salt
1 cup all-purpose flour
1 egg
splash of vanilla
sugar for dredging

Steps:
Prepare to fry the churros by heating oil in a pan or large deep skillet to 360 degrees F.

Beat 1 egg and stir in splash of vanilla, set aside.

To make churro dough, heat water, margarine and salt to rolling boil in 3-quart saucepan; stir in flour. Stir vigorously over low heat until mixture forms a ball, about 1 minute; remove from heat. Stir in egg and vanilla mixture quickly so egg does not cook and become scrambled!


Spoon mixture into cake decorators' tube with large star tip (like the kind used to decorate cakes). I tried to use my decorators tube but my icing tips were too small and I didn't have the right tools, so I used my cookie press. The shape wasn't "exact" but it was close enough! Squeeze 4-inch strips of dough into hot oil.


Fry 3 or 4 strips at a time until golden brown, turning once, about 2 minutes on each side. Drain on paper towels. Roll churros in sugar or dump the sugar on the pile of churros.


Chocolate Sauce:
4 oz dark chocolate, chopped (I used Sao Thome chocolate)
2 cups milk
1 tablespoon cornstarch
3 tablespoons sugar


Steps:
Place the chocolate and half the milk in a pan and heat, stirring until the chocolate has melted. Stir the cornstarch in the remaining milk and whisk into the chocolate with the sugar. Cook on low heat, stirring constantly, until chocolate has thickened - about 5 minutes. Add extra cornstarch if it doesn't start to thicken after 5 minutes. Remove from heat and mix until smooth. Pour into cups of small bowls for dunking churros - do not pour over the churros.

Serve warm.


My husband and I had a lot of fun making this and it turned out really well, bringing us back to Spain. The worst part was clean up - I think it took me about 45 minutes after all the dishes and pots I used to make this. At least I made it on a Sunday so I had some time!

The recipe made a lot, so we have some leftover...hopefully they keep. Next time we'll probably make this when we have friends coming over - perfect party dish!

Sunday Sundae!


Today I bring you the Pop-Tart Sundae! We had purchased some of the Kellogg Ice Cream Sundae Shoppe Pop-Tarts and my husband wanted me to use the Strawberry Milkshake one in an ice cream sundae for him.

He wanted the Pop-Tart frozen, so it sat in the freezer for a few days before I made this sundae. You don't need to freeze it for days...a few hours should suffice, but I just never got around to making that sundae for him for a few days after it was put in the freezer.

Anyway, this was a simple sundae...I broke the frozen Pop-Tart in half, then arranged some cookies n cream ice cream between the 2 pieces. Some whipped cream topped that and then I used a touch of strawberry topping as a garnish. Chocolate syrup finished it off.

My husband ended up loving the sundae with the Pop-Tart as a base. His review on the Strawberry Milkshake Pop-Tart by itself was so-so, but he liked it with the ice cream. We have another Ice Cream Shoppe Pop-Tart in the house for me to try with him...that one is called Ice Cream Sandwich.

Stay tuned for more sundae ideas!