Monday, December 26, 2011

Low-Fat Oatmeal Muffins


My husband the baker is back!! :-) I am so happy, since I seriously suck at baking. And last weekend he made these oatmeal muffins that we gobbled up in days. So he just made a new batch and we are already down 2.

So I am sharing this recipe that he found on Food.com. It's really easy to modify this recipe according to your taste for add-in's also. For example, I like the muffins plain, but my husband likes them with raisins. We just tried dried cranberries which were tasty, but I still prefer the muffins plain and he likes raisins better.

But you could add apples, chocolate chips, other dried fruits... etc. Anything you like with oatmeal.

And the best part - they are low-fat. Healthy. YUM!

They take about an hour and a half from start to finish, but it is not all active time. And they are worth it.

Here is the recipe: (12 muffins)

Ingredients:

1 cup rolled oat (old fashioned oatmeal)
1 cup skim milk
1 cup whole wheat flour
1/2 cup brown sugar , packed
1/2 cup unsweetened applesauce
2 egg whites
1 teaspoon baking powder
1/2 teaspoon baking soda
1/2 teaspoon salt

Directions:

Soak oats in milk for 1 hour. (We put it back in the fridge while it is soaking).

Combine all ingredients in a large bowl.

Spoon into a muffin pan that has been lightly greased or sprayed with nonstick spray. (We use muffin/cupcake cups)

Bake at 400 F for 20-25 minutes.

Variations: To make Oatmeal Raisin Muffins, Oatmeal Apple Muffins, or Oatmeal Chocolate Chip Muffins, add raisins/chopped apples/chocolate chips to the batter.


Enjoy! We like these as part of breakfast or a mid-morning snack! Yum!!

Saturday, December 24, 2011

Game Day Snack/Meal Week 16 - Pepperoni Polenta Pizza Wheels


So as my husband was getting ready to sit down to THE game, Jets vs Giants, I made him a "game day lunch." I had purchased a polenta log from Trader Joe's because I was really curious about working with it. I know, it's better to make your own fresh polenta, but I really wanted to try this.

I tried searching for recipes using the log, or even just general polenta recipes, but I couldn't find many that used polenta in creative ways. So I decided to do something simple - little pizzas. Also very game day-ish.

So I sliced up the polenta and dipped it into some olive oil that had been mixed with garlic powder, Italian seasoning and a little paprika. Then I grilled it for a few minutes on each side.

Once I felt the flavors were soaked in, I transferred the polenta wheels to a baking tray and topped them with turkey pepperoni, sauce and cheese.

Once cooked for about 10 minutes in the oven, it was ready to eat! I gave my husband his plate first as I made mine and I heard "this is really good," coming from our kitchen table before I even sat down. So I guess it was a success!

It was a lighter lunch, so these can definitely be made and served as a snack for the game, but it packed a lot of flavor.

So here is a run down of the ingredients and the steps - this is just something I threw together, I didn't follow any recipe.

Ingredients:

One polenta log from Trader Joe's
Shredded mozzarella
Shredded Parmesan
Tomato sauce
Hormel turkey pepperoni, chopped
olive oil
garlic powder
paprika
Italian Seasoning

Directions:

Preheat the oven to 375 degrees F.

Slice the log into pieces, no more than 1/2" thick.

Mix the garlic powder, paprika (just a pinch) and Italian seasonings together and then pour some olive oil into the bowl. Stir until well combined.

Dip each polenta slice into the oil mixture and place on a grill pan. Grill on each side on medium heat for a few minutes.


Transfer polenta slices to a baking sheet and top with pepperoni, sauce and cheese.


Bake until cheese is melted.

Enjoy!

Hope everyone has a happy holiday! I am not sure if this will be the last week of game day snacks, or if I will make one for week 17. It this is the last, it's been fun. Hopefully I have time to do this next season with a little baby in the house!

I'll try to have some Superbowl snacks up though!

Sunday, December 18, 2011

Using Eggplant for Dinner - 2 Ways!!


I LOVE when I can make two different dinners from just one main ingredient. Last weekend my husband and I purchased an eggplant to use for dinner for the week. I am very picky about the way I eat my eggplant...I don't like it in certain forms.

I wanted to do something different, yet healthy. So I started searching for some eggplant recipes that were kinda low in carbs but cooked in a way that I would enjoy.

The first thing I came across was for something the original "chef" called "Eggplant Mexicano." It intrigued both myself and my husband, though when we ate it, while SUPER tasty, we couldn't figure out why it was really considered "Mexican."

I also saw someone post a recipe for "eggplant pizzas" which was essentially just a non fried eggplant parmesan, but I added some pepperoni to it and it was actually very good! So, I sliced up my eggplant into round slices and set half aside for the Mexicano and half aside for the "mini pizzas."

I started by making the mini pizzas. I followed no recipe, just sort of made it up as I was going along.

Ingredients:

Round eggplant slices
chopped up pepperoni (I used Hormel turkey pepperoni)
your favorite pizza/pasta sauce
mozzarella cheese
oregano
crushed red pepper flakes

Directions:

After I cut the eggplant, I lightly salted each side and let them rest on a paper towel. Then I grilled the slices for a few minutes on each side to start to get them nice and tender.


Once I thought the eggplant was tender enough, I moved it to a baking dish and put the chopped pepperoni on each slice.


Then I spooned some sauce over that and sprinkled a dash of crushed red pepper flakes over the sauce.

The cheese went next, followed by a sprinkle of oregano.

Then I baked it at 375 degrees F until the cheese was melted with hints of browning on it, cause I like it that way!


Once the mini pizzas were good to go on the baking sheet, I started on the eggplant Mexicano. I followed the directions of the recipe to a point, but instead of Monterey Jack cheese I used sharp cheddar because that is what I had in the house.

I also baked these after grilling them instead of just grilling and plunking salsa and cheese on them. I baked them with the salsa and cheese on the slices so it was a little more melted and it turned out great!

Ingredients: (with what I used, click link above for original)

1/2 cup vegetable oil
1 teaspoon garlic powder
1 teaspoon dried oregano
eggplant slices
2/3 cup salsa (I like fruity salsas so I used a cherry salsa!)
1/2 cup sharp white cheddar cheese

Directions:

In a bowl, combine oil, garlic powder and oregano.

Brush over both sides of the eggplant.


Grill, uncovered, over medium heat until slightly tender.

Place slices onto baking sheet and spoon salsa over them. Then sprinkle the cheese over the salsa.


Bake at 375 degrees F until tender and cheese is melted.

(Pizza on the left, Mexicano on the right)


So there you go, delicious eggplant two ways!

My husband and I ate the mini pizza ones first. He had a side of garlic bread, I had a side of peas to try and cut some carbs.

A few nights later we enjoyed the Mexicano ones. All in all, it was a successful use of the eggplant!

Game Day Dessert Week 15 - Six Layer Cookies


So, today's recipe came from my company's newsletter that came out on Friday the 16th. There were some "holiday" recipes in there, and this one caught my eye. It's originally called "Seven Layer Cookies," but one of the layers was coconut and I hate coconut.


Here is the original recipe: (click on it for a larger view)


It seemed easy enough so I wanted to try and make it. The result did come out very, VERY tasty, but either mine still wasn't cool enough to cut, so it turned into a crumble of sorts (still very tasty to eat) or it needed to be baked a minute or two longer or it needed to be chilled in the refrigerator. I don't have the answer yet - and I just put the remainder of the dish in the fridge to see if that solidifies it a bit more so they can be cut into perfect squares.

I really need to stop attempting to bake since I could never get it perfect but at least the correct flavor of the cookie recipe was there and my husband and I are more than happy to eat it as a fork and knife dessert or over plain ice cream or something!

I also wanted to post the original recipe because I made quite a few changes, just to flavors. Instead of regular graham crackers, I used cinnamon graham crackers, because that is what we had in the house.

Instead of butterscotch chips, I used white chocolate chips, for the same reason. We used to have butterscotch chips, but I guess we used those up.

Lastly, instead of pecans, I used peanuts. We had cashews, peanuts and almonds in the house, so I chose the peanuts.

My revised combination tasted great and you can tell how easy this recipe is to manipulate. None of my changes should have affected the consistency. I have a feeling it needed a minute or two longer baking time and then refrigeration to solidify.

I also thought baking it at 275 was a little odd, it seemed low, so I wonder if there was a typo in my company newsletter. I wish I knew who the recipe came from to ask!

Maybe those of you better at baking than I am will know the answer!

Anyway, as mentioned, the original recipe is above, and here is what I used:

Ingredients:

1 stick butter or margarine
2 cups graham cracker crumbs (I used cinnamon!)
1 12 oz package of semi-sweet chocolate chips
1 12 oz package of white chocolate chips
1 can sweetened condensed milk
1 cup chopped peanuts

Directions: (I halved the recipe, but these are directions for full size!)

Melt butter in a 9 x 13 pan.

Mix and press graham cracker crumbs in with butter to form a base.


Add all the other ingredients in order listed.


Bake at 275 degrees F for about 20 minutes.

Let cool completely before cutting into small squares.

Enjoy!


The recipe was very, very easy to make and I was about to put it together in about 7 minutes and then bake it. The cooling takes the longest.

I'll see what happens after refrigeration time - if it solidifies more, success! If not, well, back to the drawing board when it comes to baking! What else is new?

Also, a reminder for you sports fans who play fantasy baseball. The season is coming up and my husband's website, www.rotoprofessor.com, does an annual fantasy baseball draft guide. It is sold online via Excel for $6 and once it is released (sometime in January), it will get updated every 2-3 weeks and re-sent to you via e-mail until the baseball season officially starts.

This is the 3rd year for the draft guide and it gets rave reviews. Many fantasy baseball fans appreciate the low cost and constant updates as opposed to the pricier magazines in the stores. So hurry up and reserve your copy today! The RotoProfessor is currently hard at work making sure it will be finished on time for its release!

As for the Eating With A fans, I actually have a few recipes from the past week that I never posted (blame it on some jackass who left me so stressed I didn't have time for something else!)

So watch out for those as well!

Ta Ta For Now!

Sunday, December 11, 2011

Game Day Snack Week 14 - Spicy Cheese Bread!


Sorry for the delay in posting this, since games started an hour ago where I live, but it was worth the wait!

Last night I was searching for a recipe to make and I typed "game day foods" into Google. I tried the word foods instead of snacks so I could hopefully get a little bit of a different search. it worked, and I found this list of 20 "hearty" game day recipes.

This one here (called Judy's Cheese Bread) caught my eye and my recipe was inspired by it, but I changed it completely. Well, I used different ingredients, the idea is still the same.

When I sent it to my husband for his approval he said "eh, it looks good but it isn't blowing me away." Well, too bad, I wanted to make it. (Yet as he was eating it he was like, "this is really good!!!"). Men.

It was REALLY easy to make, the cooking took the longest time. You can throw this together pretty quickly for people watching the game or a pack of hungry kids.

The original recipe contained sourdough bread, jack cheese, onions and melted butter. I used a hard wheat roll (I made individual sized instead of a huge loaf), a mix of sharp cheddar and Parmesan cheese and olive oil mixed with onion powder and paprika with a dash of crush red pepper flakes sprinkled over the top.

Click the link above for the original recipe, or follow mine below. You can always pick the cheese you like to use the most too and make your own creation!

And now, the recipe. Enjoy!!

Ingredients:

1 loaf round sourdough bread, unsliced ** (I used a hard wheat roll from our grocery store's bakery. You just need a "harder" bread, and mine made an individual size)
1/2 pound grated sharp cheddar and Parmesan mix (about 6-8 oz)
1/4 cup dried parsley
olive oil
onion powder
paprika
crushed red pepper flakes

Directions:

Preheat oven to 350 degrees.

Cut bread into diagonal slices, about 1 inch apart, stopping before you cut through the bottom of the loaf.

Cut bread in the opposite direction in the same manner, creating diagonal shaped cubes, taking care not to cut through to the bottom.


Carefully stuff the space in between each cube with cheese and parsley.


Pour some olive oil into a small bowl and mix in the desired amount of onion powder and paprika. Then, drizzle over the bread, making sure to get some in the cracks between the cubes. You can also brush some on top of the bread for extra flavor.

Wrap in foil and place in the oven for 20 minutes. Unwrap the top of the loaf and bake for 15 minutes more, to crisp up the crust.

Serve immediately.

Monday, December 5, 2011

Guest Post - Red Velvet Cake Pops (by Melissa!)


Once again, my cousin-in-law, Melissa, has written a guest post for the blog. Good job on the recipe, Melissa! You should mail some to us :-) (and PS - I hope you used a Michael's coupon for the Lollipop Sticks!)

Everything from here on is all Melissa's words. Enjoy!

RED VELVET CAKE POPS!

While doing my routine Facebook stalking, I came across pictures of cake-pops that my friend made for Thanksgiving desert. I was instantly inspired, as it's unlike anything I've ever done before. So after doing a bit of research I decided to attempt it. I probably shouldn't have done this after work when I was exhausted because prep through clean up took me FIVE hours. Seriously.

Here's what you'll need:

Lollipop sticks
Parchment Paper
Candy Melts
Sprinkles (Optional)
Frosting
Cake Mix
Piece of styrofoam

Of course, you can make your cake and frosting from scratch, but I had a box of Duncan Hine's Red Velvet mix that I wanted to use (I bought it on sale and with a coupon -- SCORE!)

I went to Michael's for the lollipop sticks, candy melts, sprinkles, and styrofoam.

First, bake the cake following the box directions. Let it cool. I let it sit out for an hour, then put in the freezer for ten minutes.


Take the cake out of the pan and put it in a mixing bowl, crumbling it into pieces.


Then add a bit of frosting and start to mix together, gradually adding more frosting as needed. I initially mixed with a rubber spatula, but towards the end I used my hands to make sure everything was evenly coated.

Next, shape the dough into small balls, placing them on a cookie sheet covered with parchment paper. Slip them into the freezer for 10 minutes so they hold together.

Toward the end of the 10 minutes, melt your candy melts. I did this in the microwave as I don't have one of those special double boiler things to use on the stove.


Take the balls out of the freezer.

Take your lollipop sticks and dip them into the melted chocolate, then insert them into the balls half way. After you've inserted the sticks to all your cake balls, place the baking sheet in the fridge for about ten minutes - it will help the cake stay on the stick.


Once you take the cake balls out of the fridge, you can start dipping! I found this part to be extremely difficult. After testing a lot of different methods, I realized it was easiest for me to melt a large amount of the chocolate in a tall, narrow coffee mug. I dipped the entire ball into the chocolate and slowly pulled it out. The melted chocolate makes it REALLY HEAVY, so be careful when you pull it out of the mug so as not to yank the stick out.

I held the chocolate covered ball over the mug for a little while to let the excess chocolate drip off. Then, I put sprinkles all over it!


Then stand the pops upright in a styrofoam slab to dry. For me, this made 42 pops.

EAT!

Like I said, this took a really long time. It's not something I'll make often, but it tasted great and would be fun for a kid's party or family event.

Saturday, December 3, 2011

Game Day Snack Week 13 - Beer-Cheese Dip! (And a "cheese steak" sandwich!)


So here is a dip for the beer lovers! I found this recipe while searching for something quick and easy to make for game day. My husband and I were jaunting down to Florida to see some family this weekend, so I wanted something easy I could pick up just a few ingredients and make at the house in FL., like I did last year.

But then I saw the beer-cheese spread, and we had everything in MY house. So I knew I wanted to make it, and I did, one day after work. And my husband ate it as part of dinner the next night! Plus, it was made during the week so I could post it super early for game day people! Yay!

The recipe was relatively easy to make, though I did modify it slightly. For example, I used pumpkin beer because that is what my husband had in the house so it was more of a pumpkin beer cheese spread. (Still enjoyable!)

I also ended up heating it slightly to make the cheese melt because the way the recipe describes below, I couldn't see anything happening and I felt it wasn't getting creamy enough. So a few minutes on low heat did the trick, melted the cheese into a smoother consistency and all was good.

I couldn't taste the spread (thank you little baby to be), but my husband said it came out well. And he used it to make a steak grilled cheese sandwich the next night for dinner. And, he really enjoyed THAT. I think cooking it may have killed my beer flavor just a tad (or else I didn't use enough, or else his beer just didn't have a super strong taste). But he could taste it, just not strongly. So if you want a strong beer taste, go with a strong beer!

You chill the dip for at least 2 hours after it is prepared, so it's definitely easy to make ahead of time and bring to the game with you, or bring to someone's house.

So, enjoy and drink (er, eat) up!

Ingredients: (this recipe makes 5 cups. I actually only made half of it)


1 (2-lb.) block sharp Cheddar cheese, shredded
1 small onion, minced
2 garlic cloves, minced
1/2 teaspoon hot sauce
1/4 teaspoon ground red pepper
1 (12-oz.) bottle amber beer, at room temperature
Salt and pepper to taste
Garnish: thyme sprig (optional, I did not use)


Directions:

Beat together first 5 ingredients at low speed with a heavy-duty electric stand mixer until blended.

Gradually add beer, beating until blended after each addition. Beat at medium-high speed 1 minute or until blended and creamy.


Season with salt and pepper to taste.

Cover and chill 2 hours. Garnish, if desired.

Store in an airtight container in refrigerator up to 2 weeks.

** This recipe can be frozen for up to a month. Thaw overnight in the fridge.


My husband made his steak grilled cheese sandwich by slicing some steak really thin. He heated the steak, and then put it on some rye bread. He spread the cheese dip on one side of the bread. Then he buttered the outsides of the sandwich and put it on the grill pan for about a minute and a half each side.


Delish! He ate his sandwich with some garlic fries and a spicy pickle.

Enjoy!

Thursday, December 1, 2011

Parmesan-Butternut Squash Gratin


Since I loved the butternut squash so much in my Butternut Squash Lasagna, I decided to buy another one and do something different with it, especially when this recipe from Eat Better America showed up in my e-mail one day.

It looked so good, and I had planned to make it over Thanksgiving weekend for the following week. Imagine my surprise when at Thanksgiving, our family friend hosting it made pretty much exactly the same thing! It was DELICIOUS, so I knew I would definitely make it for me and my husband.

I don't really have much to say about this except it really is good. I kept the recipe exactly as is, so what I am posting below is what was sent to me in the e-mail. It does take time, you need a good hour and a half from start to finish. But even as a leftover, it still tastes amazing!

So, here is the recipe. Enjoy!

Ingredients:

1 butternut squash (2 1/2 lb)
2 tablespoons butter or margarine
2 large cloves garlic, finely chopped
1/4 cup panko bread crumbs
1/4 cup grated Parmesan cheese
1/4 teaspoon salt
1/8 teaspoon pepper
1/4 cup chopped fresh parsley (optional, I did not use)

Directions:

Heat oven to 375°F.

Spray 13x9-inch (3-quart) glass baking dish with cooking spray.

Peel, halve lengthwise and seed squash; cut into 1/2-inch-thick slices. Arrange with slices overlapping slightly in bottom of baking dish.

In 2-quart saucepan, melt butter over medium heat. Reduce heat to low.

Add garlic; cook 2 to 3 minutes, stirring frequently, until garlic is soft and butter is infused with garlic flavor. Do not let butter brown.

In small bowl, mix bread crumbs, cheese and 1 tablespoon of the butter-garlic mixture.

Brush squash slices with remaining butter-garlic mixture. Sprinkle with salt, pepper and bread crumb mixture.


Bake uncovered 30 to 40 minutes or until squash is tender when pierced with fork.

Increase oven temperature to 425°F; bake 5 to 10 minutes longer or until lightly browned.

Before serving, sprinkle parsley over top, if desired.

Sunday, November 27, 2011

Game Day Snack Week 12 - Chocolate Chip Cinnamon Mini Cakes


I got the recipe for this week from a coupon circular a few weeks ago. It was called Chocolate Chip Coffee Cake, but after making this and eating it, my husband and I can't figure out why it would be classified as coffee cake (unless since the instructions say to serve with coffee brings in the coffee part..), but they sure were tasty little afternoon treats. So, I am calling them mini cakes.

The recipe was very easy to make. It took me about 10 minutes to put all the ingredients together, and then 24 minutes to bake them.

They are easily transportable too!

I also had all of the ingredients in the house so I didn't have to buy anything special. That was great!

Here are the ingredients:

Non-stick cooking spray
2 1/2 cups Buttermilk pancake mix OR 2 1/2 cups light pancake mix
1/3 cup sugar
1/2 cup mini semi-sweet chocolate chips
1/2 cup water
1/2 cup sour cream
1/2 teaspoon vanilla extract

Topping:
1/4 cup sugar
1/2 teaspoon ground cinnamon
1/4 cup walnuts, finely chopped (optional, we did not use)


Here are the directions:

Pre-heat oven to 375 degrees F.

Coat an 8 or 9 inch square pan with non-stick cooking spray.

Combine the pancake mix, 1/3 cup sugar and chocolate chips in a medium sized bowl. Add in the water, sour cream and vanilla extract.

Blend well.

Using a cake scoop or an ice cream scoop, shape dough into 16 2-inch balls.

Place in 4 rows of 4 each in prepared pan.

Combine the topping ingredients in a small bowl and sprinkle over the dough.


Bake 24-26 minutes or until golden brown.

Cool for 10 minutes before serving.

Enjoy a sweet game day treat!

** Also, remember! For those of you sports fans who play fantasy baseball, Rotoprofessor.com is having a sale this weekend on its annual draft guide! This is the 3rd year this draft guide is being sold and it gets rave reviews! For just $6 you get a comprehensive draft guide electronically, with updates every 2-3 weeks until the baseball season starts. $5 through Monday night so hurry!!

Thursday, November 24, 2011

Thanksgiving Day Pancake Breakfast!


Every year my husband and I switch off families. When we eat with his family, we drive a few hours to Albany and get there around noon and eat in the middle of the afternoon. When it is my family, we only drive 10 minutes down the road and we eat around 5 pm.

So on the years when it is my family, we eat a bigger breakfast, then just a little mid-day snack and then a BIG dinner! This happens to be my year. Two years ago we went to i-Hop for pancakes since they had a gingerbread pancake I wanted to try and something else that my husband wanted to try for their special holiday pancakes.

This year we decided to budget and make our own pancakes at home since 1) we are just trying to budget in general, 2) we have to save for the little one coming and 3) black Friday deals for things we actually NEED break our budget a little. So instead of going out, we spent $2.19 for pancake mix (yes, we were going to cheat and just flavor up the mix instead of starting from scratch) and we used ingredients we had in the house.

And, it WORKED! We just ate a HUGE breakfast and it was delicious. My husband decided to use some of my blackberries I snack on and make cinnamon sugar blackberry pancakes. I decided to replicate the gingerbread pancakes I had two years ago. (And my pancakes turned out WAY more successful than his!!) We also made some tater tots and oatmeal. Yum!

So for the blackberry pancakes, all my husband did was mix up the pancake mix, then put blackberries on the pancakes once he dropped them on the griddle and sprinkled some cinnamon sugar on each pancake.


They were good, but needed a little more spice - so we either needed to mix the cinnamon sugar into the batter or add some stronger flavor like straight cinnamon or nutmeg or something. But we liked the tart blackberries with the pancakes.


Here is the (general) recipe I used for my gingerbread pancakes.
- One cup boxed pancake mix
- 1/2 tsp cinnamon
- 1/2 tsp nutmeg
- 1/4 tsp ground ginger
- 2 tsp unsweetened cocoa powder
- 7 tsp brown sugar
- 3/4 cup water

Mix well and drop spoonfuls onto a griddle as usual.


To me, they tasted AMAZING! I was so proud of my effort to throw it together. I read two similar recipes online so I kind of combined them and winged it and it worked. And we have a bunch of pancakes leftover for the rest of the weekend! Yay!

I decided to add whipped cream and sprinkles to my gingerbread pancakes because that is how I was served at i-Hop and man, it was delicious. :-)


All in all, it was a great Thanksgiving morning. Next year, we will be eating on the road as we trek to Albany with an 8 month old.

Happy Thanksgiving everyone!!

Tuesday, November 22, 2011

Side Note for Those Who Play Fantasy Baseball!

For those of you who like the Game Day snacks, they were inspired a long time ago on my husband's fantasy sports website, www.rotoprofessor.com.

He does a draft guide every year for the baseball season and sells it for just a few dollars and it gets updated electronically every 2-3 weeks until the season starts.

So if you play fantasy baseball, head over to the Rotoprofessor and check out the coming draft guide - this is the 3rd year it is being released and it gets rave reviews! There will be a black Friday sale for the guide this year, so get yours now!

Sunday, November 20, 2011

Molten Chocolate Surprise - A Kraft Recipe


The other day while I was at work, my husband sent this recipe to me that he got from the Kraft page on Facebook.

These little chocolate morsels looked delicious! We also had everything in the house already, so I knew I wanted to try and make them over the weekend.

That's just what I did Sunday right before dinner. I made these little molten chocolate cookie/cake things.

Being the craptastic baker I am, I was a bit worried, but these turned out fine except for two things. 1) Mine don't look as pretty as the ones in the picture on the link website because the batter leaked under the cookie in the muffin tin and covered some of it, so you can't see the cookie as well because they look browner from the batter, and 2) I managed to bake them for like, 1 minute too long so the center of my cookie was not as molten-y. Live and learn.

My husband better get back to baking soon because he is much better at it and I need him to be the baker for when our son needs stuff for school! I refuse to send him with embarrassing mess-ups! (Granted, he's not even born yet and we're talking a few years down the road but still, my husband can bake way better than I can. I need to stick to cooking).

The recipe was REALLY easy though, and takes less than a half hour to do. So it's perfect to surprise kids with after school or to whip up for right after dinner. And, it's just delicious!

So here's the recipe, straight from the Kraft website - I made no substitutions except using semi-sweet chips instead of squares of chocolate, but only because I had chips in the house.

Ingredients:

4 squares BAKER'S Semi-Sweet Chocolate
1/2 cup butter or margarine
2 whole eggs
2 egg yolks
1 cup powdered sugar
1/3 cup flour
12 CHIPS AHOY! Cookies
1/2 cup thawed COOL WHIP Whipped Topping


Directions:

Heat oven to 425°F.

Microwave chocolate and butter in large microwaveable bowl on HIGH 2 minutes or until butter is melted.

Stir until chocolate is completely melted.

Beat whole eggs, yolks, sugar and flour with whisk until well blended. Gradually beat into chocolate mixture.

Line 12 muffin pan cups with paper liners; spray with cooking spray.

Place 1 cookie, upside-down, on bottom of each cup; cover with batter.

Bake 8 minutes or until cakes are firm around edges but still soft in centers.

Cool in pan 1 min. Carefully remove cakes from pan.


Invert into dessert dishes; remove paper liners.


Serve topped with Cool Whip.


There is a little hint at the bottom of this recipe on the website that says you can make the batter ahead of time and refrigerate it for up to 24 hours. When you are ready to bake, just pour the batter over the cookies - so this makes it really easy to do during a dinner party!

Enjoy!!

Game Day MEAL Week 11 - Hearty Mac n Cheese Bake


Sorry for the delay, but with our team on at 8:30 pm (EST) tonight, my husband found no reason to hurry me along in making a snack for while he was watching football. So instead, we have something we can eat for dinner! A hearty Mac n Cheese bake - yum!

It's definitely very easy and it could be even easier depending which route you go. I cheated today (after cleaning up our backyard and getting all our patio furniture into the shed for winter) and used Kraft Mac n Cheese as my base.

If I wasn't feeling so lazy, I probably would have made the Mac n Cheese from scratch - so if you do that, just start with making your favorite recipe with nothing else in it besides the noodles and cheese.

The other ingredients we used were frozen mixed vegetables, chopped up turkey pepperoni (Hormel!), mango chicken sausage (from Trader Joe's, my favorite, but you can use whatever sausage you like), breadcrumbs and a little shredded cheddar.

Once the Mac n Cheese was done, we used half a bag of frozen mixed vegetables that we nuked slightly in the microwave to get them a little softer and mixed it into the noodles. Then we added the chopped pepperoni and sliced sausage and mixed everything until it was evenly distributed.

Then we sprinkled some breadcrumbs on the top, along with some shredded cheddar and baked it at 350 degrees F for about 20-25 minutes, until the breadcrumbs looked golden and crunchy.


The end result was deeeeelicious! (We stole some bites since it is for dinner). The pepperoni we have has a slight kick so it added that, while the sausage gave it a sweet element. It's definitely a heartier way to eat Mac n Cheese that will keep you full for a long time.

Although quick and easy, this turned out well and we'll definitely be making it again. Though I might try making my macaroni and cheese from scratch next time when I am not feeling so lazy!

Enjoy and happy game day!

Monday, November 14, 2011

Turkey Meatloaf - 2 Ways!


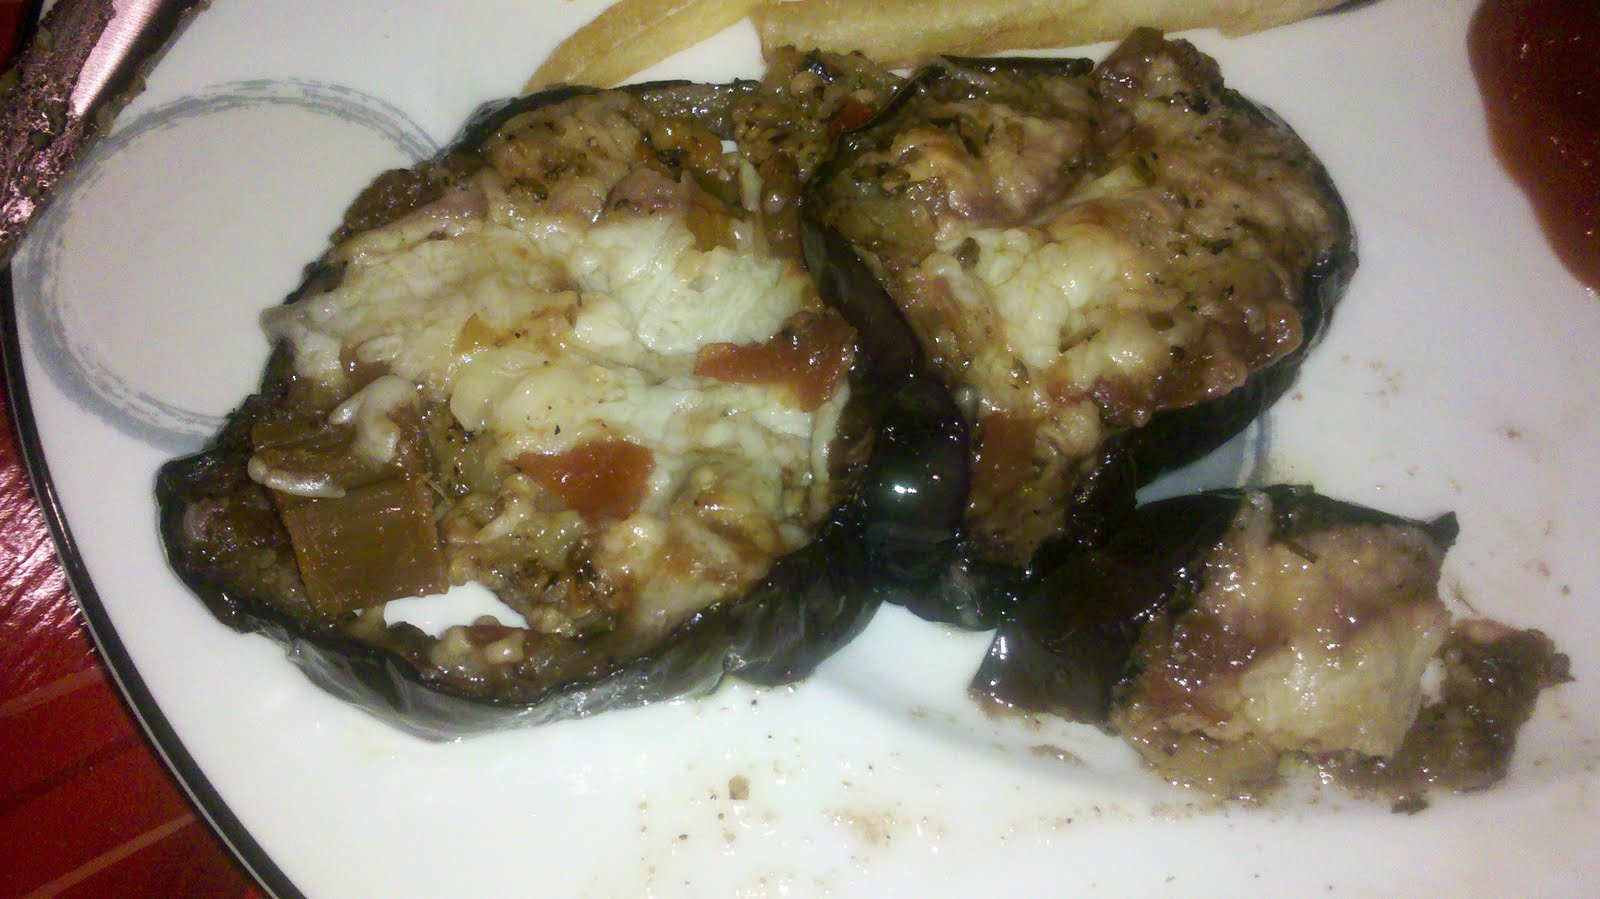
Yeah, Thanksgiving is a little over a week away and I chose to make turkey meatloaf this week. Timing is everything! Well, I actually made 2 turkey meatloaves; one stuffed with stuffing and one stuffed with tater tots!! At least I can freeze these if I think we're going to start getting too turkey'd out.

We had ground turkey in the freezer that we needed to use, and we just purchased a bunch of Stove Top stuffing boxes thanks to a great sale at one of our local grocery stores and a fantastic coupon making each box under $1. So my husband and I knew we wanted to combine one of the stuffing mixes with the ground turkey - so I started my research for recipes.

I found a few basic turkey meatloaf with stuffing recipes so I used one and just changed it a bit to make it more of my own.

I also found a recipe using hash brown potato patties (no stuffing in this meatloaf, just the potatoes), and both my husband and I were intrigued. I knew I could substitute tater tots since we had a huge bag of them in our freeze that needs to be used as well.

So I split the package of ground turkey in half and used half for each recipe. We both sampled a piece of each for dinner and they turned out great! My husband favors the tater tot loaf over the stuffing one and I am the exact opposite. But the important thing is - they worked. And we have dinners for a few nights...or lunches if we make a meatloaf sandwich!

Each recipe will be listed below. I will include the links with the original recipes, but will post my versions with the changes I made.

Turkey Meatloaf with Stuffing Inside! (Based on original recipe here).

Ingredients:

1 1/2 lbs ground turkey
1 box stuffing mix (I used Stovetop Sage flavor)
2 eggs
1/3 cup milk (water
1/2 cup onion (diced)
1/2 cup celery (diced)
1/2 cup dried cranberries
breadcrumbs
black pepper
nutmeg
dried parsley
paprika


Directions:

Prepare stuffing according to directions on the box. Set aside when done.

Combine eggs, turkey, breadcrumbs, onion, celery, milk and cranberries in a large bowl. Mix well. (I didn't include an exact measurement of breadcrumbs, it is used as a binder so use just enough that the meatloaf will hold together).

Transfer half to a greased loaf pan, and form into a meatloaf shape.

Spread stuffing on top of that half of meatloaf mixture.


When covered, take the remaining half of the mixture and put it on top of the stuffing. Form into a meatloaf shape and make sure to seal the edges so the stuffing is completely inside the turkey.

When formed, sprinkle the pepper, nutmeg, paprika and parsley flakes on top. (Season to taste).


Bake uncovered for 50-60 minutes in a preheated 350 degree oven.

Remove from heat and allow to rest for ten minutes before slicing.


Tater Tot Turkey Meatloaf! (Based on original recipe here).

Ingredients:

1 lb ground turkey
12 cup diced onion
10 3/4 Oz cream of mushroom soup (divided)
1 egg
2/3 cup breadcrumbs (I used panko)
1/2 tsp salt
1/2 tsp pepper
1/4 tsp garlic powder
tater tots (I used 14 of them)
shredded cheddar


Directions:

Preheat the oven to 350 degrees F.

In a large mixing bowl, add ground turkey, onions, 1/3 cup cream of mushroom soup, egg, breadcrumbs, salt, pepper and garlic powder.

Mix together by hand until all ingredients are well blended.

Coat an 8 x 13 or 10 x 13 casserole dish with non-stick spray.

Press half of the meat mixture into a long rectangle in the dish.

Position the tater tots from the center out. There should be an inch or at least a half inch of meatloaf all around the edges, and you can add meatloaf where needed.


Spread the rest of the cream of mushroom soup evenly over the tater tots. Try not to get the soup on the meatloaf.


Carefully press the rest of the meat mixture flat between your hands and place piece by piece over the tater tots until completely covered.

Bring the edges of the meatloaf together, pinch and smooth out bumps. No soup should peek through.

Sprinkle a small amount of shredded cheddar over the top if desired.


Place casserole dish uncovered in oven. Bake for 1 hour.

Let the meatloaf rest for 5 minutes before serving.


Since both recipes baked at the same temperature and for the same amount of time, I was able to prepare both and then bake them together, which made it easy to do 2! I would say preparation for each only took about 10-15 minutes, so it was about a half hour total of prep and then baking. Definitely something to do when you are home for a good few hours and not trying to throw together dinner after work.

All in all they turned out well and we'll be making them again! I could see the stuffing one being used for Thanksgiving as an alternative to a regular turkey for those who opt for a "different" Thanksgiving!

Enjoy!

Sunday, November 13, 2011

Game Day Snack Week 10 - Cranberry Habanero Cheese Spread


Today's recipe is, if I do say so myself, absolutely delicious. I decided to make it somewhat Thanksgiving themed since Thanksgiving is coming up and people may also be looking for good appetizers to serve before the big feast. So I found a list of things I could make with what I had in the house with only having to purchase one or two things, since my husband and I are trying to budget this month and buy only what we really need.

My husband picked this recipe, which I got from the Taste of Home website. This recipe was originally called Cranberry Jalapeno Cheese Spread, but it became my own creation and renamed Cranberry Habanero Cheese Spread with the substitutions I made on a few of the ingredients, which I will discuss below.

I will be posting my version of the recipe, so if you want to go with the original version, use the link provided above.

This recipe is also very, VERY easy to make and takes about 20-25 minutes, plus a little cooling time. It is a fantastic dip for crackers, chips, celery or whatever you like using. It can be served warm or cool, and is great for tailgating or a party appetizer. (I myself am thinking about making this for Thanksgiving this year!)

The substitutions I made were because I didn't have an exact ingredient in the house, or because I don't like something, like jalapenos. That is my husband's thing. He likes spicy peppers. So instead, we decided to use the Mango Habanero jelly I have in the house to cook with from Really Good Foods. It was a good compromise because 1) I didn't have to go buy a jalapeno, 2) I didn't have to force myself to try and eat something with fresh jalapeno in it and 3) we both love this jelly which is sweet with just the right amount of kick, and when you mix it with the cheese, it cools it down a bit.

I also substituted Trop 50 Mango Pineapple juice for the regular orange juice that the recipe calls for, but only because that was the only citrus juice we had in the house. We debated buying a small travel bottle of OJ but in the end, decided the juice we had in the house would mesh better with the mango habanero jelly.

Otherwise, I used what the recipe called for. The end result was seriously, fantastic. I loved it! My husband and I ate it with some home made pita chips and celery, and we have a little left over which I will definitely be using for a snack at work this week. It's also a HEALTHY recipe! 2 tablespoons only equals 88 calories! So it's delicious, filling with celery and healthy. Can't beat that.

I think we'll be making this again in the future for sure. I liked it too much not to!

Enjoy!

And now, the recipe (remember, my version, not the original!)

Ingredients:

1 cup dried cranberries
1/2 cup packed brown sugar
1/2 cup Trop 50 Mango Pineapple juice
2 teaspoons Mango Habanero Jelly from Really Good Foods (or a spicy fruited jelly if you have one!) ** use more teaspoons for a spicier treat!
1 tablespoon lemon juice
1 teaspoon grated orange peel
1/4 teaspoon Chinese five-spice powder
1 package (8 ounces) reduced-fat cream cheese
Assorted crackers or vegetables


Directions:

In a small saucepan, combine the first seven ingredients.

Bring to a boil.

Reduce heat; simmer, uncovered, for 10 minutes or until thickened. (This could take less than 10 minutes, it did for me).

Remove from the heat; cool completely.

In a large bowl, beat cream cheese until fluffy. Beat in cranberry mixture until blended.

Serve with crackers or vegetables.

Yield: 2 cups.