Showing posts with label chocolate. Show all posts

Monday, April 11, 2011

Peanut Butter and Chocolate Pie!


Amazingly (or not), this is the first recipe I am posting that actually contains peanut butter. Most people I know LOVE peanut butter. My husband LOVES peanut butter. Me, I hate the stuff. Seriously - I know. It's sacrilegious. But I could never get into the stuff. I actually have gotten into almond butter in the past two years - but just can't eat peanut butter.

This pie, however, is one my husband made for our May 2010 BBQ and my mother-in-law actually made something similar for Father's Day last year. In both situations, it went over well for people who like that stuff. In fact - it was eaten so fast at our BBQ that my husband barely got any!!

It's pretty easy to make too! This recipe serves 10. Enjoy!

Ingredients:

16 Oreo cookies, finely crushed
1/3 cup unsalted peanuts, finely crushed
1/4 cup butter, melted
1 (8 oz) package brick cream cheese, softened
1 cup smooth peanut butter
3/4 cup sugar
1 cup whipped cream, thawed
1 square Baker's semisweet chocolate

Directions:

Preheat oven to 350 degrees F.

Mix cookie crumbs, peanuts and butter until well blended - press firmly onto bottom and up the sides of a 9" pie plate.

Bake 10 minutes and cool completely.

Beat cream cheese, peanut butter and sugar in a bowl with a mixer on medium speed until well blended. Stir in the whipped topping.

Pour over the crust and cover.

Freeze at least 3 hours or overnight. Remove pie from freezer 30 minutes before serving.

Melt chocolate as directed on package and drizzle or smear over the top of the pie.

Let stand at room temperature until pie is soft enough to cut into slices, and serve.

Store any leftovers in the freezer - though there may not be any!!

Saturday, January 1, 2011

A Toast to the New Year with Jello Shots!


Ah...good ol' jello shots. A college staple, right? Well, for New Years, my husband and I decided to go old school and make some jello shots.

But instead of using plain ol' vodka, we used chocolate vodka - with strawberry jello - and created chocolate covered strawberry jello shots!!

These were delicious! You couldn't taste the vodka part at all (just the chocolate flavor), which made these a little dangerous. But it was a fun twist to an old school classic.

Here is a recipe for jello shots in case you need one...

Boil 2 cups (16oz) of water.

Pour 2 cups of boiling water into a large glass mixing bowl, very carefully.

Add 1 package of the flavor jello you want to the mixing bowl.

Stir the jello for about 2 to 3 minutes to make sure the jello is dissolved.

Add 6oz of cold water to the jello mixture and stir for about 20 seconds

Add your desired alcohol to the jello mixture - approx 8oz to 10oz - depending on how strong you want your jello shots.

Arrange your desired containers on a large cookie sheet or board that will fit into your refrigerator so you can easily transport them after pouring.

Pour the jello mixture into a measuring cup to make it easier to pour into the cups or containers you want your jello shots in.

Put the baking sheet with the jello shots in the refrigerator. Let your jello shots set overnight, they will be ready sooner but overnight is best.

Enjoy!!

Eating With A is already off to a strong start for 2011 as I have a few recipes to post already, which is better than I had been doing in November and December. Watch for some yummy things coming up and have a wonderful new year!!

Sunday, December 12, 2010

Sunday Game day Snack - a sweet "Twist" of a snack!


Today's snack will be more sweet than savory, but everyone needs a sweet treat in their life sometimes.

I made these on Saturday for a holiday party. I actually had some puff pastry lying around the freezer for a while that I bought on sale, so I figured I'd find something with other ingredients we have in the house.

I found a great recipe on PuffPastry.com for sweet and spiced twists. They are easy to make, just a little timely because you need to let things chill or thaw for a bit. I changed the recipe a bit to use cinnamon sugar instead of ginger. The original recipe is here.

Ingredients:

1/2 of a 16-17.3 ounce package Puff Pastry Sheets (1 sheet). Pepperidge farm makes good ones, as well as Trader Joes.
1 egg
1 tablespoon water
1/3 cup sugar
Cinnamon Sugar
6 ounces dark or semi-sweet chocolate, chopped
1 tablespoon of shortening

Directions:

Thaw the pastry sheet at room temperature for 30 minutes or until it's easy to handle. Heat the oven to 350°F.

Lightly grease or line 2 baking sheets with parchment paper. Beat the egg and water in a small bowl with a fork.

Sprinkle some cinnamon sugar on a work surface. (I also dusted the work surface with a hint of cocoa sugar as an added bonus!)

Unfold the pastry sheet on the sugar. Sprinkle a little more cinnamon sugar over the pastry.

Roll the pastry sheet into an (apprx) 14-inch square. Fold the pastry sheet in half, making an (apprx) 14 x 7-inch rectangle.

Cut the pastry crosswise into about 24 (1/2-inch wide) strips. Twist the strips and place 2 inches apart on the baking sheets, pressing down the ends. Brush the twists with the egg mixture.

Refrigerate for 20-25 minutes.

Bake for 20 minutes or until the twists are golden. Remove the twists from the baking sheet and cool on a wire rack.

Place the chocolate and shortening into a microwavable bowl. Microwave on HIGH for about 1 minute. Stir until the chocolate is melted and smooth. If the first minute isn't enough, continue to microwave on 15 second increments until the chocolate is completely melted and smooth.

Dip half of each twist in the melted chocolate and place on a waxed paper-lined pan. Sprinkle with some sugar crystals. Refrigerate for 10 minutes until the chocolate is firm.

Store the twists in an airtight container with waxed paper between the layers until ready to serve.

* Tip: Don't worry if you unwrap your chocolate and the surface has whitish streaks. This is called "bloom" and occurs when chocolate isn't stored at the optimal temperature. Bloom is harmless and the chocolate is fine to eat or to use in recipes.

Monday, November 15, 2010

Black and White Cookies...


One of my FAVORITE treats are black & white cookies. They are just amazing! But they have to be done right - I like then they are soft. I was once at a wedding where they served black & white cookies but the cookie part was crunchy and it seemed fake to me. Black & white cookies should almost be like a cake.

Anyway, I just had to talk about the ultimate black & white cookie that my husband and I just had in Orlando, FL.

In Universal Studios, there is a little bakery called Boulangerie, with delicious looking desserts inside. But this one treat caught my eye, and they called it the Othello.

It was a monster black & white cookie with chocolate shavings on the top. !!! No words.

We ordered it and dove in. Usually, I like the chocolate part better than the white part of the cookies but this time, the white chocolate took the cake. Literally. YUM!

Needless to say the 2 of us devoured this delicious treat rather quickly. It was a lovely little afternoon snack!

Stay tuned - later this week will be an interesting take on stuffing for Thanksgiving!

Sunday, October 24, 2010

Chocolate Covered Pretzels - Halloween Edition!


My husband and I have always wanted to play with the candy molds at the arts n crafts stores like Michael's. Every time we go in we see the bags of colored chocolate melts and we swear that one day we will make some.

Well, that day was over the weekend. My husband was out at a baseball show, so I was left alone to do the errands. Since the grocery store is right next to Michael's, I decided to splurge and I purchased a candy mold you can use with pretzels. I got finger bones!!

I decided to purchase white and green candy melts and give it a try. I wanted to make bloody bones and tried to use red food coloring on one of the bones, but it didn't come out the way I wanted just yet. But I had fun trying out my first 9 candy molds.

I did buy a decorator brush so I could make more intricate designs in the future.

This is a fun activity to do, and it hardly takes any time. Melt some chocolate, design your mold and pop it in the fridge for a half hour at the most.

Yum!

Sunday, October 3, 2010

Fruity Chocolate Cookie Cakes


A few Saturdays ago, my husband and I were stuck in the house while the fence company was here installing our brand new fence. (bye bye ugly chain link fence, helllooooo new white PVC!)

I decided to try and bake something since I was kind of bored and a few nights earlier I was at a work function for my new job and the guys were joking that the new girl needed to buy lunch for everyone. Well, forget that, but I could bring in baked goods or something.

I was flipping through some cookbooks that friends had given me for my birthday and came across these cookie cake things. I had all of the ingredients in the house, so I decided to give it a go.

I made one error - you were supposed to bake them in cupcake pans (which I did) but I ALWAYS end up filling the baking cups too much. So my little cookies were a bit thick. My husband, when tasting the finished product, said it was good but a little dense. Yeah, well, they were super thick. Haha. At least they were edible!!

Anyway, the recipe below calls for apricot jam but honestly, this recipe is super adaptable to whatever kind of preserves/jam/jelly you like with chocolate. I could see strawberry tasting fabulous!!

They were easy enough but I am not sure if I personally will make them again - didn't turn out to be my favorite treat I've made. But they got good feedback from my husband and the guys at work. They had to be good - they inhaled them rather quickly...

Here is the recipe:

Ingredients

1/2 cup sugar
2 eggs
1/2 cup all purpose flour
6 tablespoons apricot-orange marmalade or apricot jam
4 1/2 ounces of semisweet chocolate pieces

Directions

1. Preheat oven to 375 F. Grease muffins tins, preferably non stick. (Or cheat and use baking cups like me!)

2. Stand a mixing bowl in hot water for a few minutes to heat through - but keep the inside of the bowl dry.

3. Put the sugar and eggs in the bowl and mix with a hand mixer until light a frothy, when the beaters leave a ribbon trail when lifted.

4. Sift the flour over the mixture and stir in gently using a large metal spoon.

5. Divide the mixture in the muffin tins. Bake for 10 minutes until just firm and pale golden around the edges.


6. Cool on cooling rack.

7. Spoon a little jam on the center of each cookie. (Try to keep fruit chunks out of it).


8. Put chocolate into a heatproof bowl and set over a pan of gently simmering water. Heat - stirring frequently - until melted and smooth. If you need more smoothness, toss in a sliver of shortening.

9. Spoon chocolate on top of each cookie and spread gently to the edges. Leave to set for at least 1 hour.


Enjoy!

Thursday, September 23, 2010

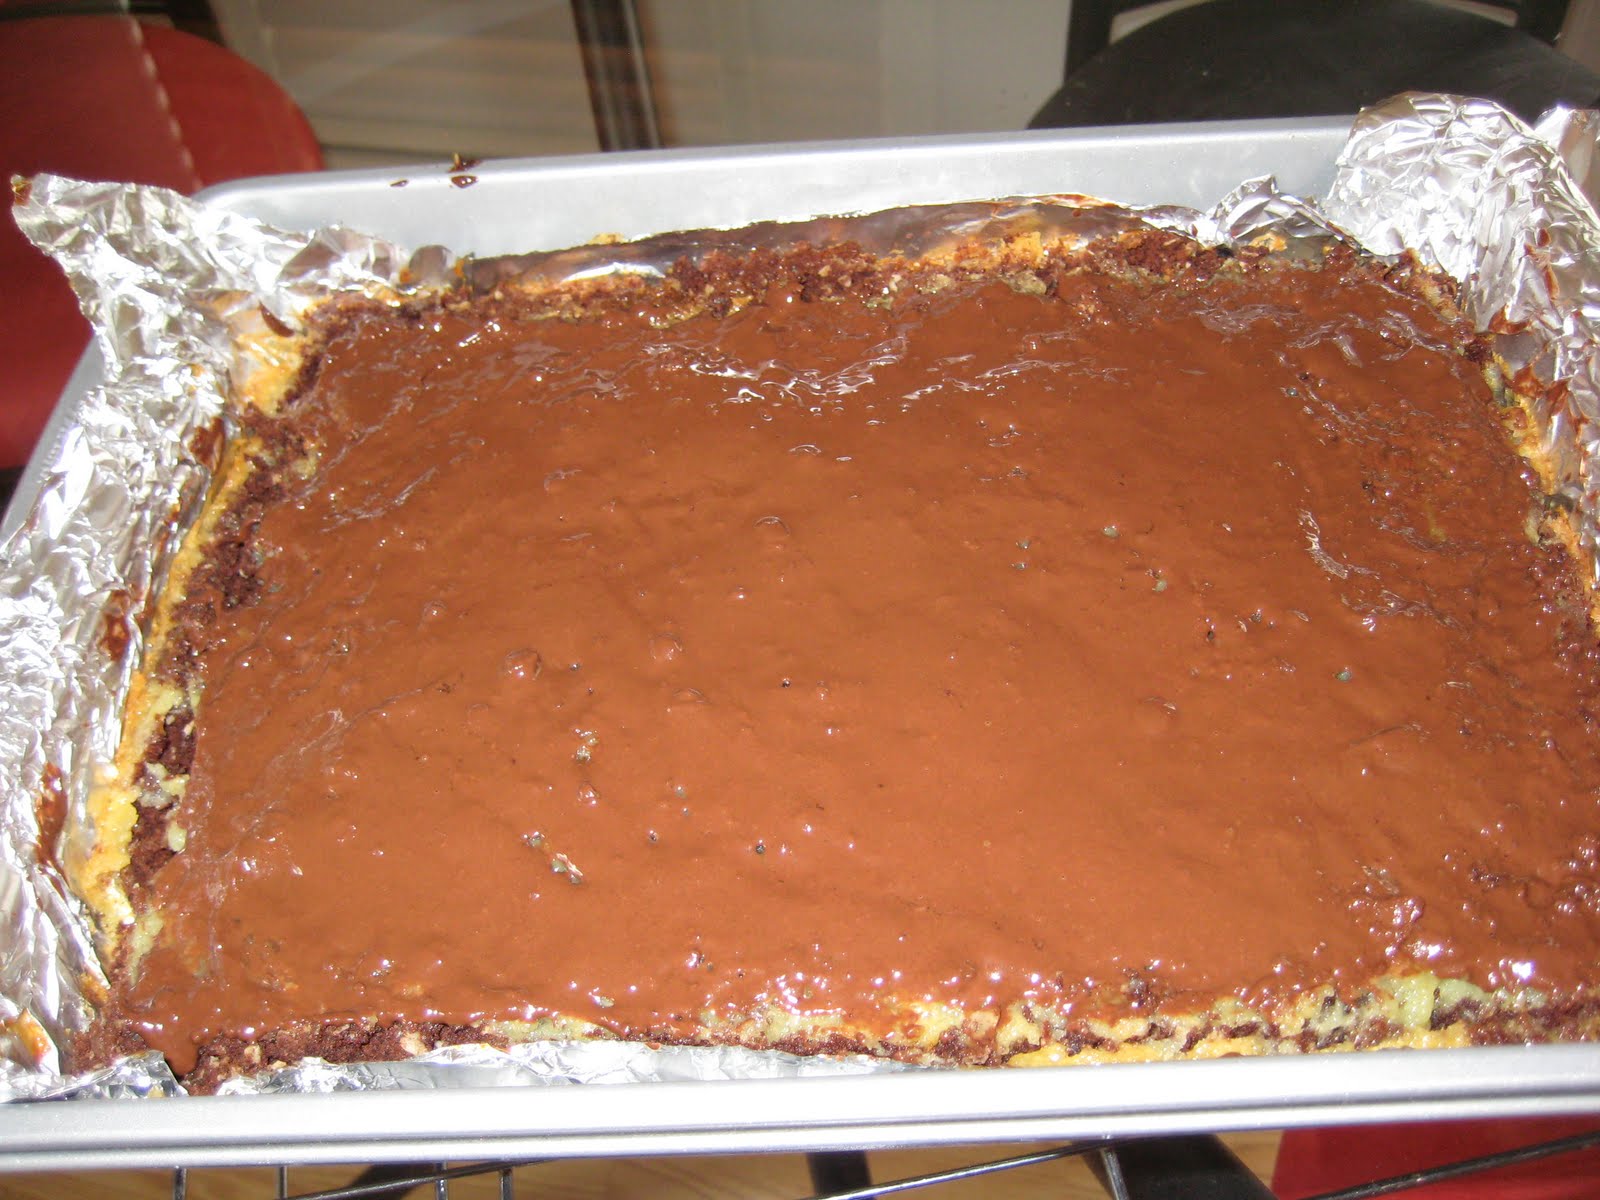
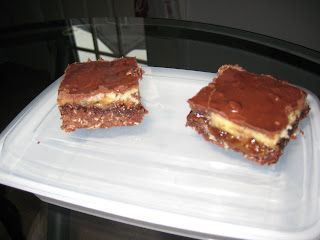
Chocolate Caramel White Chocolate Mousse Bars


Wow...that title is a mouthful, huh? Well, that's because in my quest to create one of my two desserts for Yom Kippur, I combined two recipes.

You see, I had been given a challenge by my "big brother," our close family friend whose house we were going to for Break Fast. He told me to create a dessert that was blog worthy and different.

Since I am not the baker in the family, that was a challenge for me. I searched the Internet for days and hours and nothing called to me. I had suggestions from a few friends to make bars, such as lemon or chocolate chip because they were easier to make than cookies and travel well. Some people suggested pies such as pecan or peanut butter with Oreos. They were all good suggestions but nothing called to me.

So last Friday I spent over an hour scouring my recipe books and the Internet just ONE more time to find something. One thing I settled on was my friend's idea to make a bar of some sort - I never made one before so I wanted to give it a try. I've made brownies, but only like, box mix kind. Haha. Finally, two things on the Betty Crocker website caught my eye...and I thought they would taste mighty delicious if I combined them together. The original recipes are here and here.

Here is my creation...

Ingredients:
Cake part/bottom layer
1 box Betty Crocker® SuperMoist® devil's food cake mix
3/4 cup butter or margarine, softened
1 egg
2 cups quick-cooking or old-fashioned oats

1 jar caramel sauce (won't use whole jar but have a full jar for however much you want to use)

White Chocolate Mousse Filling
3/4 cup whipping cream
1 cup white chocolate chips
3 eggs
1/3 cup sugar
1/8 teaspoon salt

Topping
1/2 cup semisweet chocolate chips
1 tablespoon shortening


Directions:

Heat oven to 350°F (325°F for dark or nonstick pan).

Generously grease bottom and sides of 13x9-inch pan with shortening or cooking spray.

In large bowl, beat cake mix, butter and egg with electric mixer on low speed until well mixed.

Stir in oats until crumbly (use fingers if necessary). ** Stir oats in a little at a time. I used close to the full amount and my feedback was a a general consensus to use less oats. They didn't ruin the dessert, but it did make it a bit heavier. I would go with less oats next time.


Press mixture in pan (use plastic wrap or waxed paper to press mixture if it is sticky).


Spread the caramel sauce on the top. Make sure you do your best to cover the entire bottom layer as it will keep the bars moist. The caramel is hard to spread but definitely try - some of my edges weren't fully covered and they turned out drier.

Meanwhile, in 1-quart saucepan, heat whipping cream and baking chips over low heat, stirring frequently, until chips are melted. Remove from heat. Cool 5 minutes.

In large bowl, beat eggs, sugar and salt with wire whisk until foamy. Pour white baking chip mixture into egg mixture, stirring constantly.

Pour filling over bottom layer and caramel layer.


Bake 28-32 minutes or until white chocolate top springs back when lightly touched and the caramel bubbles along edges.

Cool in pan on cooling rack 15 minutes and also run knife around sides of pan to loosen bars.

Meanwhile, in 1-quart saucepan, melt topping ingredients over low heat, stirring frequently.

Spread chocolate topping over bars. Refrigerate uncovered until chilled, about 2 hours.


For bars, cut into 6 rows by 6 rows.

Store covered in refrigerator.

I LOVED this recipe because I am a sucker for gooey, heavy brownie type desserts. That's my love. My mom said they were good but she prefers lighter desserts. My husband liked it but wanted less oats to make the bottom layer a little lighter.

I'm just happy it was edible. Not being a baker, it was a HUGE risk to combine two recipes blindly without knowing if it would work.

I would try it out again - but you need a good chunk of time to make these. They are definitely a rainy day stuck in the house on a Sunday type project. But to me - worth it. Yum!

My mom though, would prefer I make my Irish Cream Cheesecakes more - she proclaimed it the BEST dessert I ever made. Well, shucks.
:-)

Sunday, August 8, 2010

Churros With Chocolate


A few months ago my husband and I went on a cruise out of Barcelona and with the little bit of research I did on Barcelona before we went, the one thing that stood out to me was to eat some "Churros con Chocolate" (Churros with Chocolate.) Being a huge chocoholic, I immediately put that on my list and and knew to look out for places selling such a treat.

This dessert did not disappoint - it was fantastic. We had it after dinner our first night. The churros are fried dough with just a tiny bit of sugar on them - not like the cinnamon sugar ones that are sold in the US. They get served with a cup of steaming, thick hot chocolate and you dip the churros into the chocolate to eat them. OH MY GOD! It was seriously delicious.

I loved it so much that we had it as a snack again the next day before we went to the ship, and then at one of the stops on the cruise there was a place selling them so we ate some at 11:00 in the morning. One of my goals after coming back home was to make this dessert myself...and 4 months later I finally did.

The recipe is not particularly hard but it was a little messy and I had dishes everywhere. I am also thankful that my husband, despite being down an arm at the moment due to shoulder surgery, was able to help me out since there were many steps at once and I didn't want to burn anything. He manned the churros cooking in the oil while I mixed up the chocolate.

Here is the recipe I used:
Whatever oil you like to cook foods in - I used vegetable
1 cup water
1/2 cup margarine or butter
1/4 teaspoon salt
1 cup all-purpose flour
1 egg
splash of vanilla
sugar for dredging

Steps:
Prepare to fry the churros by heating oil in a pan or large deep skillet to 360 degrees F.

Beat 1 egg and stir in splash of vanilla, set aside.

To make churro dough, heat water, margarine and salt to rolling boil in 3-quart saucepan; stir in flour. Stir vigorously over low heat until mixture forms a ball, about 1 minute; remove from heat. Stir in egg and vanilla mixture quickly so egg does not cook and become scrambled!


Spoon mixture into cake decorators' tube with large star tip (like the kind used to decorate cakes). I tried to use my decorators tube but my icing tips were too small and I didn't have the right tools, so I used my cookie press. The shape wasn't "exact" but it was close enough! Squeeze 4-inch strips of dough into hot oil.


Fry 3 or 4 strips at a time until golden brown, turning once, about 2 minutes on each side. Drain on paper towels. Roll churros in sugar or dump the sugar on the pile of churros.


Chocolate Sauce:
4 oz dark chocolate, chopped (I used Sao Thome chocolate)
2 cups milk
1 tablespoon cornstarch
3 tablespoons sugar


Steps:
Place the chocolate and half the milk in a pan and heat, stirring until the chocolate has melted. Stir the cornstarch in the remaining milk and whisk into the chocolate with the sugar. Cook on low heat, stirring constantly, until chocolate has thickened - about 5 minutes. Add extra cornstarch if it doesn't start to thicken after 5 minutes. Remove from heat and mix until smooth. Pour into cups of small bowls for dunking churros - do not pour over the churros.

Serve warm.


My husband and I had a lot of fun making this and it turned out really well, bringing us back to Spain. The worst part was clean up - I think it took me about 45 minutes after all the dishes and pots I used to make this. At least I made it on a Sunday so I had some time!

The recipe made a lot, so we have some leftover...hopefully they keep. Next time we'll probably make this when we have friends coming over - perfect party dish!