Showing posts with label chicken. Show all posts

Tuesday, October 11, 2011

Apple Honey Chicken!


So this year’s Yom Kippur chicken dish was inspired by Food Network Magazine. There was a recipe for Apple-Honey coated drumsticks that looked absolutely delicious. However, since my father is SUPER picky, and he won’t eat any dark meat, I used chicken breasts instead so this turned out more like a marinade than a coating over the chicken.

But the end result was fantastic! The marinade had great flavor and because the chicken basted in it for a day, when I heated it up, it was so nice and moist. I’d call this a success!

So here is how I changed the recipe…instead of baking the drumsticks, I used a skillet on the stovetop and gently cooked the chicken until it was just cooked through. I made the sauce, and then I put the chicken in a large Tupperware, poured the sauce over it and stuck it in the fridge for a day and a half until I served dinner. Then I just baked it in its marinade for about 15, 20 minutes. Normally I wouldn’t marinate for so long, but I was making my Yom Kippur dishes over several nights, so in this case, the extra soak time really helped the chicken. I would say overnight or a few hours would do it also.

If you don’t have the time and just pour the marinade over the chicken and eat it right away, it should also work, since that is how the recipe was designed to begin with.

I’ll definitely make this again – it had a delightful sweet and tangy flavor. It was also really easy and not too time consuming.

Here is the recipe:

INGREDIENTS:

• 12 skin-on chicken drumsticks (I used 5 chicken breasts)
• Kosher salt and freshly ground pepper
• 2 cups apple juice
• 1/2 cup apple cider vinegar
• 1/4 cup low-sodium soy sauce
• 2 teaspoons honey
• Grated zest of 1 lemon
• 1/8 to 1/4 teaspoon red pepper flakes
• 2 teaspoons sesame seeds (optional)
• 1 tablespoon unsalted butter

DIRECTIONS:

Preheat the oven to 450 degrees F. Set a wire rack on a rimmed baking sheet. Put the drumsticks on the rack and season both sides generously with salt and pepper. Bake 30 minutes; flip the drumsticks and continue baking until golden and crisp, about 30 more minutes.
(*** This is obviously for the original recipe. I used a skillet on medium heat and sautéed the chicken until just cooked. Then I set it aside on a plate until I placed it in the marinade).

Make the sauce: Bring the apple juice, vinegar, soy sauce, honey, lemon zest, red pepper flakes and a pinch of salt to a boil in a large skillet over medium-high heat.

Reduce the heat to medium low and simmer until the sauce is syrupy and coats the back of a spoon, 20 to 25 minutes. Set aside until the chicken is done.
Stir the sesame seeds into the sauce, if using, and warm over medium heat, if necessary.

Transfer the chicken to a large bowl. Add the sauce and butter and toss to coat. Season with salt and pepper.

Transfer the chicken to a platter and drizzle with any remaining sauce from the bowl.

Sunday, April 10, 2011

Pesach Chicken Pie


I made the following recipe for Passover 2010 - this is actually my final Passover post for the moment...all the recipes I made last year have now been posted. If I make any before Passover starts for this year, I'll post them up quickly! Otherwise, they will be posted, but hopefully you will all come back looking for them next year!

Last March I was doing a LOT of Internet searching for different passover recipes. This one caught my eye. The original source for it is a booklet for Pesach from the Bar Ilan school in Rio de Janiero.

The recipe was decent...definitely nothing super special, and not the best thing I made. My husband enjoyed it more than I did. Maybe it will strike your interest!!

Ingredients:

5 to 6 pieces of matzo
1 pound minced chicken meat
chopped parsley and green onions to taste
2 eggs
1 medium potato, cooked and mashed
1 big onion, chopped
garlic, pepper and salt to taste
2-3 TBS oil

Directions:

Soak the matzo for 3 minutes in warm water with salt. Try to keep them as whole as possible while wringing out the water.

Oil a pie pan and place half the matzo inside.

In a skillet on the stove top, brown the onion and add the chicken. Add salt, pepper and garlic to taste, as well as parsley and green onions. Continue to brown the mixture.


Let it cool and add the mashed potato mixed well with 1 beaten egg. Put this filling over the matzo in the pan and cover it with the remaining matzo.


Beat the other egg and pour it over the matzo in the pan - bake 15 to 20 minutes until golden.

Tuesday, April 5, 2011

Chicken, Sweet Potato and Apple Skillet


So, today's recipe comes to you from the place where I am employed. Every quarter, we get a company wide newsletter. It talks about what goes on in our two facilities in New York and North Carolina, has some random tidbits of information, news about employees, etc. Recently I noticed they have been including a recipe as well.

I am not sure who comes up with the recipes, or where they get them, but the one in April's newsletter seemed interesting.

It was for a chicken, sweet potato and apple skillet. I knew I would have to change it up a little because the original recipe (see picture below) called for bacon and brussels sprouts, two foods I do not eat. I figured I could substitute broccoli for brussels sprouts and just leave out the bacon entirely.


I also knew I would substitute green apples for the golden delicious because I only like green apples.

So, over the weekend I purchased the ingredients I didn't already have in the house and set about making this dish. In my opinion, unless you are a wiz at chopping and dicing, leave a good hour and a half for this recipe. I wouldn't make it after coming home from work! It was easy enough once everything was peeled, chopped and diced though.

I decided to make some whole wheat couscous to serve with the meal. In the end, it came out okay...I don't know if I let something cook a little too long or if it needed the bacon for the extra flavor...but to my husband and I, we really felt like it needed some sort of sauce. I know, I know. This was a recipe for heart health (or so said the recipe in the newsletter). But, it needed a little something extra. I'd really have to sit down and think about what I could put on top of it if I ever make it again.

So, here is the recipe that I used (the modified one) - enjoy! And if you make it, tell me your thoughts on what I can add to it!!

Ingredients:

1 LB boneless, skinless chicken breasts, cut into 1/2" cubes
4 tsp olive oil
1 1/2 cup broccoli florets
1 medium sweet potato (abt 8 oz) peeled and cut into 1/2" cubes
1 medium onion, chopped
2 Granny Smith apples, peeled, cored and cut into 3/4" cubes
4 cloves of garlic, sliced
1/4 tsp dried thyme
1/4 tsp ground cinnamon
1 cup reduced sodium chicken broth
1/8 tsp salt

Directions:

Season chicken lightly with salt and heat 2 teaspoons of the olive oil in a large skillet over medium high heat.

Add the chicken and cook until lightly browned and cooked through - about 5 minutes. Transfer to plate.

Return pan to heat and add remaining 2 teaspoons of oil. Add broccoli, sweet potato and onion. Cook, stirring occasionally, until crisp-tender, about 5 minutes.


Stir in apples, garlic, thyme and cinnamon. Cook 3 minutes.


Pour in 1/2 cup of the broth, bring to a boil, and cook until evaporated, about 2 minutes. Add reserved chicken and remaining 1/2 cup broth.


Season with salt and black pepper as needed. Cook until hot, about 2 minutes.

Monday, April 4, 2011

Mandarin Chicken Skillet


I don't know if any of you watch Chopped on the Food Network, but we love that show over here. For those who don't know about it, the basic idea is there are 4 contestants to start. They each get a basic full of the same mystery ingredients and they need to cook an appetizer using all of the ingredients in the basket, plus anything else they want from the pantry area. The worst dish in the appetizer round gets chopped, and then the 3 remaining contestants get a new basket for the entree round. It then goes to 2 contestants for dessert and then one of them wins $10,000.

Well, it is always interesting to see the ridiculous items in each basket and what people do with them. I have actually learned about a lot of foods and techniques through this show.

But anyway, I sort of have to challenge myself now to use things that are in my pantry before they go bad. My husband and I have slowly been cleaning out every crevice of our house - kitchen cabinets included. I came across a few food items that I didn't even know we had, and I don't want to let them go to waste. Instead of combining all 4 into a dish (that probably would have been nasty), I took one item and just searched online for recipes using it. This ingredient was Mandarin Oranges in a can. Yeah, I know they are yummy on their own, but I wanted to use them.

I found THIS recipe on AllRecipes.com and thought it sounded good. I had to change it slightly though because 1) we had no broccoli in the house, 2) my husband isn't a huge mushroom fan, 3) we didn't have orange juice concentrate and 4) I later realized I didn't have chicken bouillon.

HAHA! At first I was like, um, why am I making this. Then, I figured out some substitutions, so I now present to you, Mandarin Chicken Skillet the A way.

Ingredients:

1 cup chopped asparagus spears (I used the frozen Trader Joe's spears I had)
1 tablespoon butter
2 pounds skinless, boneless chicken breast meat - cubed
1 cup edamame
3 teaspoons flour
2/3 cup water
1 (11 ounce) can mandarin orange segments - reserve juice separately!
1/4 cup sliced green onion
splash of orange or citrus flavored vodka
1 tablespoon of a mixture of salt, garlic powder, onion powder and paprika **

** you could use 1 cup of chicken broth instead of this seasoned mixture.

Directions:

Steam asparagus and edamame for a few minutes - set aside.

Heat butter in a large skillet over medium high heat. Saute chicken in butter until browned. Remove from skillet and set aside.


Stir in flour, water, mandarin orange juice and seasonings (or chicken broth). Heat to boiling.

Stir and simmer for 4 minutes. Return chicken and mushrooms to skillet and stir in orange segments, green onion, edamame and asparagus. Add the splash of vodka. Heat through and serve immediately.


This recipe makes about 4-6 servings.

My concoction actually came out pretty well! My husband really enjoyed it when he got home from work. I was quite pleased with myself.

We had some leftovers and I found that the best way to heat them is to put everything back into a covered skillet with a splash of water to let it heat up, instead of microwaving it.

Enjoy!

Monday, February 28, 2011

Supreme Chicken...Tenders!!


Continuing in my posts with recipes containing half & half (this is the last one, I swear!), my next dish is a chicken dish that I found on AllRecipes.com. It looked tasty to me, but contained some mushrooms. I love mushrooms, but my husband doesn't, so I was surprised when he picked this recipe out of 6 possible choices for me to make. Okay, hey, I'll go with it! Maybe his taste buds changed. Rumor has it they change every 7 years.

Anyway, so this recipe looked pretty tasty. I used chicken tenders because well, that's what I had frozen in the house, but the recipe actually called for chicken breasts. It was a very easy recipe and turned out to be very tasty!

It took me probably about 45 minutes to make from start to finish - it cooked more quickly than the recipe states because I was using the tenders and not thick breasts. So it is doable for after work during the week, but can also be made ahead and saved for another night.

Here is the recipe:

Ingredients:

* 6 tablespoons all-purpose flour, divided
* 1 teaspoon paprika
* 1 1/2 teaspoons salt, divided
* 1/4 teaspoon ground black pepper
* 6 boneless, skinless chicken breast halves
* 1/4 cup butter
* 2 tablespoons water
* 1 1/4 cups half-and-half
* 6 ounces fresh mushrooms, sliced
* 1 tablespoon lemon juice
* 1 1/2 cups shredded Cheddar cheese


Directions:

In a shallow dish or bowl, combine 4 tablespoons flour, paprika, 1 teaspoon salt and pepper.

Coat chicken with the flour mixture.

In a large skillet, brown the coated chicken in 1/4 cup of butter or margarine. Add the water, cover and let simmer covered for 25 to 30 minutes.


Meanwhile, preheat oven to 350 degrees F (175 degrees C).

When chicken is done simmering, remove from the skillet and place in a 9x13 inch baking dish; save drippings.

Combine remaining 2 tablespoons flour, 1/2 teaspoon salt and half-and-half.

Mix together and stir mixture into reserved drippings in skillet. Bring to a simmer, stirring, and cook until thick and bubbly.

Add mushrooms and lemon juice and stir together. Pour sauce over chicken and bake uncovered in the preheated oven for 30 minutes


Sprinkle with cheese and bake 3-5 minutes more until cheese melts.

Serve hot and enjoy!!

Sounds like a great recipe to put over some rice!

Monday, January 17, 2011

Chicken Taco Meatloaf


The dish I am about to present is seriously delicious. Surprisingly delicious. My husband pretty much just went, excuse my language, ape-sh*t over this dish. And has requested it again.

A lot of times I don't make the same dinner twice very often because I experiment with new tastes. Sure, we have a few standard repeaters - my Cheeseburger Pie, dumplings, fajitas, etc...but it's rare I make a lot of things over again in a short amount of time.

This one, however, will be repeated. We had a lot of ground chicken in the house thanks to a fantastic sale at a local Best Yet. I googled "ground chicken recipes" because usually ground chicken is used in this house for sweet n sour meatballs or something like that and I wanted something different.

That's how I came across THIS recipe. It looked interesting and I also had an idea forming in my mind of how to change it slightly.

I am going to post my version of the recipe first, then the other woman's version at the bottom so you can see it more easily.

The idea that formed in my mind was not using salsa, as the recipe called for, but to use this Mango Habanero fruit spread that my parents gave my husband and I for Hanukkah. It's made by Really Good Foods - a local company out in Eastern Long Island. They have the most AMAZING jams and jellies... a little pricey but seriously delicious. They also give you 50 cents back for every jar you bring back to them so if you save up enough, you get a free jar, essentially!! We can't wait until they are back out at the outlets near us all spring, summer and fall. My parents also discovered this company (on their own) and LOVE the products.


But I digress. Sorry about that - we just love this jam!

OK, so I decided to use that instead of the salsa and it definitely gave my taco meatloaf a kick!

Now, without further delay, here is my recipe: (serves 8, we halved the recipe for 4)

Ingredients

1 pound ground chicken
2 eggs
1 1/2 cups panko bread crumbs
3 tablespoons Mango Habanero jelly
2 tablespoons Ranch-style salad dressing
1 (1.25 ounce) package taco seasoning mix
1/2 cup shredded Cheddar cheese
crushed tortilla chips
sour cream


Directions

Preheat the oven to 350 degrees F (175 degrees C).

Grease an 8x4 inch loaf pan.

In a large bowl, mix together the ground chicken, eggs, bread crumbs, salsa, salad dressing, and taco seasoning mix.

Pack into the prepared loaf pan.


Bake for 45 minutes in the preheated oven.

Top with cheese and crushed tortilla chips - return to oven for 15 minutes.


Serve with sour cream.


We ate our dinner with a side of my creamy mashed cauliflower and it was just the perfect meal.

Enjoy!!


Here are the ingredients for the original recipe... use the same steps to prepare it, except bake for 1 hour and just top with cheese before serving.

Ingredients

* 1 pound ground chicken
* 2 eggs
* 1 1/2 cups bread crumbs
* 3 tablespoons salsa
* 2 tablespoons Ranch-style salad dressing
* 1 (1.25 ounce) package taco seasoning mix
* 1/2 cup shredded Cheddar cheese
* sour cream (optional)


Saturday, January 1, 2011

Sunday Game Day Snack - Potato Chip Chicken Lollipops!


Today's Game Day snack is going out with a bang as it is the last Game Day snack of the regular season. I haven't decided if there will be Game Day snacks for the playoff games - my January is a little busy. And I realized the other week we're going to be away for the Super Bowl which means I don't need to come up with tons of appetizers for my husband and I to snack on.

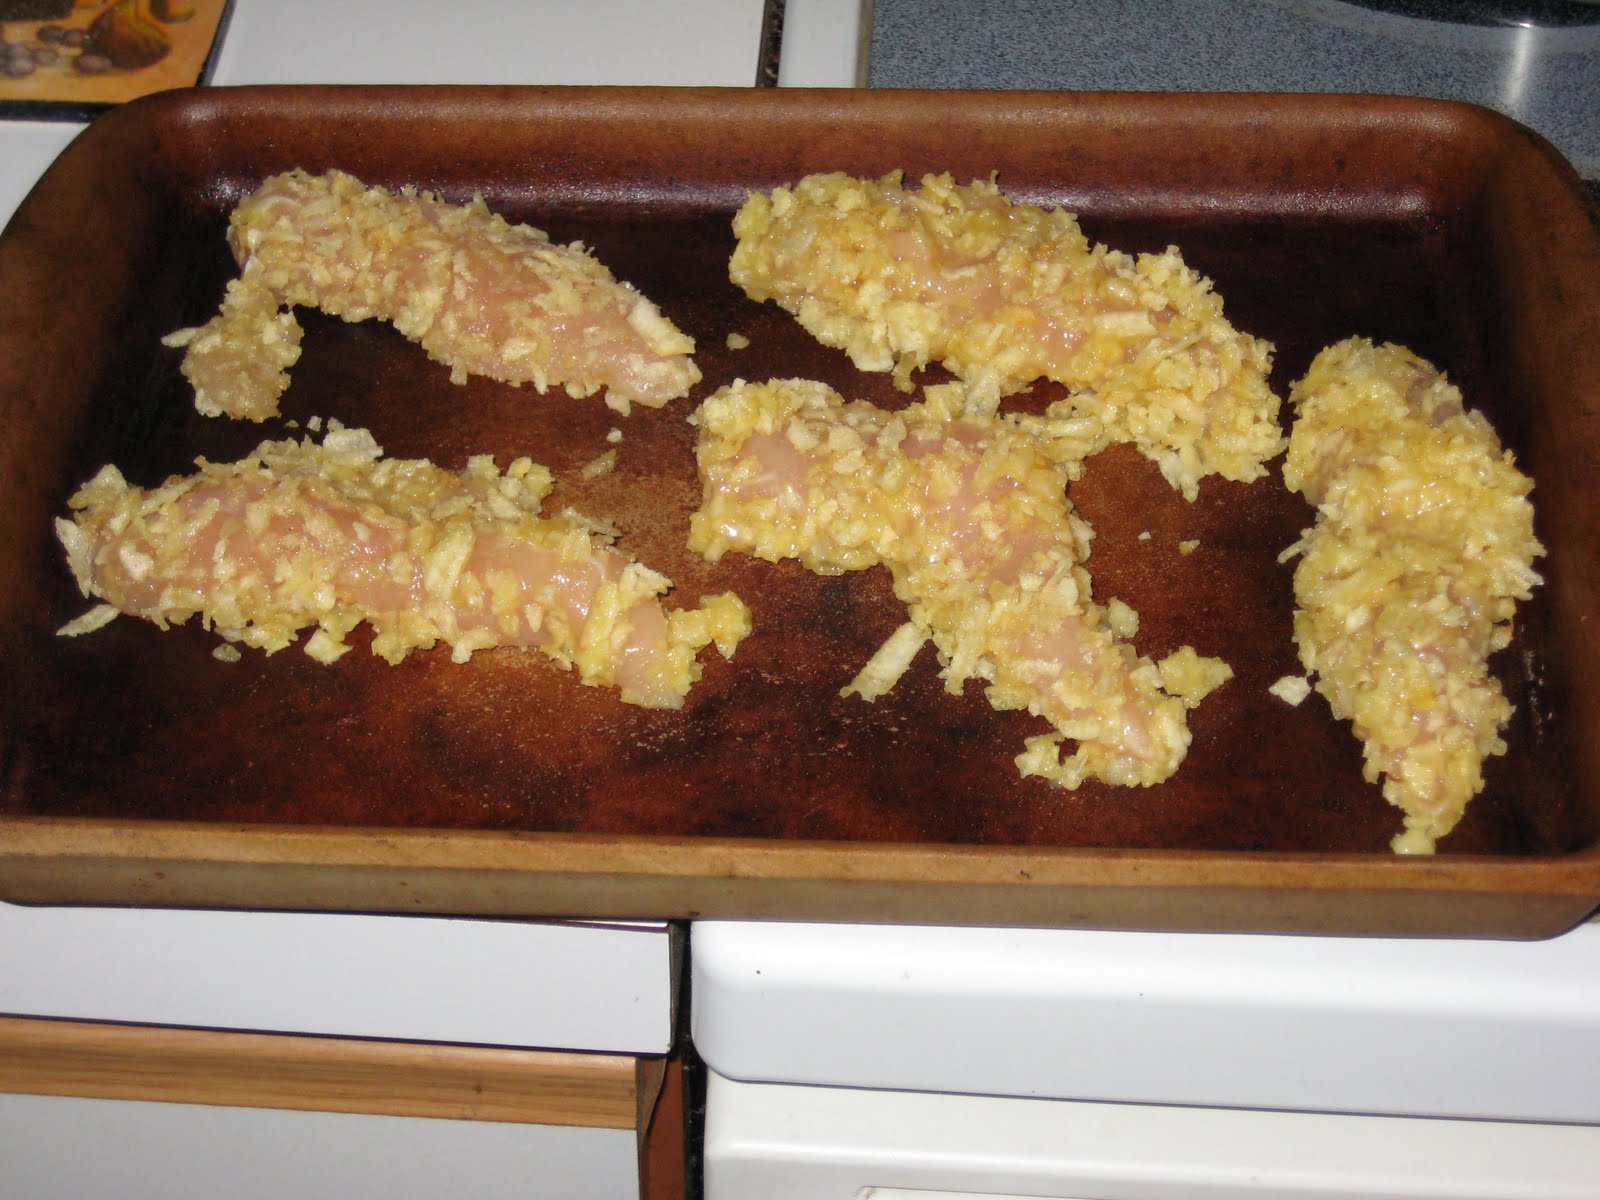
So I had to make this one good...and it was! To my surprise, this was delicious. It's incredibly easy and very versatile as well. Potato Chip Chicken!! I originally found the recipe here.

I used plain potato chips this time, because that is what we had in the house, but I can totally see using BBQ or cheddar and sour cream. Or even Doritos. Or the Baked Lays variety! So many possibilities...

Here are the ingredients:

1 package chicken tenderloins (you can cut these in half to make nuggets or keep them long. I kept them long).
1 egg
2 tablespoons milk
2 cups crushed potato chips
lollipop sticks from a craft or party store
seasonings...
*(I used crushed red pepper flakes and black pepper to season these up a little since I was using plain potato chips)
Your favorite dips, such as honey mustard or BBQ sauce.

Directions:

Preheat oven to 350 degrees F (175 degrees C).

Grease a baking sheet.

Crush potato chips onto a plate.

In a large bowl, whisk together egg and milk.

Dip the chicken into the egg mixture, then coat well with potato chips. Repeat this to do a double coat - it holds up better.


Spread the tenderloins onto the baking sheet.


Bake for 10 minutes. Turn nuggets over, and bake for 10 minutes more, until golden brown.

Remove baking sheet from oven, and insert a lollipop stick into each tenderloin.

Serve warm with your favorite dipping sauces and enjoy!!

Sunday, November 21, 2010

Chicken & Biscuits with Gravy - My "Southern" Cooking


Soooo...I am not Southern. Nope. I was born in the Northeast and have always lived in the Northeast. Well...my college WAS below the Mason Dixon line, but DC doesn't quite count. But, the other night I attempted to make a "Southern" dish, and it came out pretty tasty, if I do say so myself.

Granted, I do know if any true Southerner tried my dinner, they would give me 400 ways it could be improved upon. But my husband and I found it delicious and we were satisfied as mere Northerners.

We had a can of biscuits in the fridge that had to be used, and I recently found 1/2 pound of ground chicken tucked away in our freezer that we must have forgotten about. So, I decided to put the two together and make dinner.

As soon as I typed those two ingredients into google, of course a million biscuits and gravy results popped up. I picked this one because it looked tasty, yet simple enough to make in a short amount of time. I also know this girl took a traditional (kinda fatty) recipe and made it healthy. I like that!! :-)

This recipe will serve 2.

Ingredients:

4 fresh buttermilk biscuits, sliced
olive oil (for skillet)
ground chicken
1/4 cup flour
3/4 tsp salt for gravy.....
1/4 tsp salt for ground chicken
3/4 tsp black pepper for gravy.....
1/4 black pepper for chicken
1/4 tsp parsley flakes for gravy.....
1/2 tsp ground parsley for chicken
1 1/2 cup milk
1/8 tsp paprika
1/8 tsp brown sugar

Directions:

Ground chicken first!!

In a bowl, mix all your dry ingredients and then add the ground chicken. Mash everything together well, and put into a skillet with a little oil.

Make sure the chicken gets broken up into crumbles and cook until lightly browned - set aside.


Then make your gravy!!

Whisk all of the dry ingredients in a small bowl, then slowly whisk in the milk. Transfer the mixture to a small saucepan and heat to a simmer, whisking constantly. Once simmering, lower the heat and whisk until thick.


Put the chicken back on the heat and pour the gravy over it, mix until well combined and remove from heat.


Pour the chicken/gravy mixture over the biscuits and serve.

I changed the recipe just slightly because the girl used sage and I had none of that so I just used parsley. I also sprinkled some crushed red pepper flakes into the gravy at the end for some more flavor.

It was pretty tasty, and something different for us to do with the ground chicken.

Monday, November 1, 2010

Cherry-Mango Chicken!


Well, my parents went on vacation and came back with this mango spread for my husband and I to eat...but we didn't know what to do with it.

A few days after they gave that to us, my husband and I were at a fair and bought this incredibly delicious tart cherry jam.

Once I got home - I decided to use both spreads in a chicken dish and made cherry-mango chicken!!

I decided to use chicken tenderloins instead of breasts of chicken, and I used brown rice as my base and poured the chicken and cherry-mango mixture over it.

Here is how I made my cherry-mango glaze...

Ingredients

2 tablespoons cooking oil
salt to taste
1 small onion, diced
2 cloves garlic, minced
a few tablespoons of tart cherry jam (to taste)
a few tablespoons of mango chutney (to taste - you can also use frozen mango chunks)
2 cups Sprite
1/4 cup fresh lemon juice, or to taste
2 tablespoons brown sugar

Directions

Heat the oil in a large, deep skillet over medium heat.

Sprinkle salt over both sides of each piece of chicken; cook the chicken in the hot oil until browned on both sides, but still slightly pink in the center, 3 to 5 minutes per side.

Remove chicken to a plate and set aside.

Add the onion and garlic to the remaining oil in the skillet; cook and stir until the onion is tender and beginning to brown, 5 to 7 minutes.

Stir the cherry and mango into the mixture; cook and stir until the liquid in the pan is slightly thickened, 3 to 5 minutes.

Add the Sprite, lemon juice, and brown sugar to the mixture; stir and return to a simmer.

Return the chicken to the pan. Ladle some of the sauce over the chicken to cover.


Return the mixture to a simmer and cook until the liquid thickens and the chicken is no longer pink in the center and the juices run clear, about 10 minutes.

***Don't reduce the liquid too much-you'll want enough for serving over the chicken and rice!

The dish was decent... I am not a HUGE mango person so I probably would have just loved cherry chicken - maybe next time!!

Friday, September 24, 2010

Crispy Pretzel Coated Chicken


The following recipe was actually a suggestion from my friend Lynda. When she read my honey mustard and apple chicken post the other day, she said it reminded her of this delicious chicken recipe that she got from the EatBetterAmerica.com website.

It definitely sounded interesting so I added it to my list of recipes for my Yom Kippur dinner last week. My parents and husband ended up really enjoying the way this chicken was prepared. So, thanks Lynda!! It was a great recipe and also a huge success here.

It's also really easy to make and doesn't take much time at all. Try it out!

I also know that Lynda sometimes uses half honey mustard and half spicy mustard to give this a little zing.


Prep Time:10 min
Start to Finish:30 min
makes:4 servings (I used a little more of each ingredient to cook 6 chicken breasts)

Ingredients:

4 skinless, boneless chicken breast halves
2 egg whites
2 tablespoons honey mustard
1 1/2 cups mini pretzels, crushed (about 1 cup)
1/4 cup grated Parmigiano-Reggiano cheese
1/2 teaspoon dried thyme, crushed (I just used thyme I have in a spice jar)
Nonstick olive oil cooking spray

Directions:

Preheat oven to 425ºF.

Using the flat side of a meat mallet, gently pound chicken between two sheets of plastic wrap just until even thickness.

Place egg whites and mustard in a shallow dish; beat with a fork to mix.

In a larger shallow dish, combine crushed pretzels, cheese, and thyme.


Dip chicken into the egg white mixture. Press into crumb mixture to coat.


Place chicken in a single layer on an ungreased foil-lined baking sheet.

Sprinkle chicken with any remaining crumb mixture and press lightly. Coat with cooking spray.


Bake chicken, uncovered, for 14 to 18 minutes or until no longer pink (170°F).

The recipe is also good if you have leftovers - it definitely keeps for a day and crisps back up in the oven.

Enjoy!

Sunday, September 12, 2010

Honey Mustard Chicken and Apples


The following recipe is brought to you by the October Food Network Magazine!

While flipping through my latest issue of the Food Network Magazine, I came across this recipe and decided to try it.

My husband and I sometimes get a honey mustard chicken and pasta dish when we go to the diner so I wondered if it was similar. It is, but not entirely. The one in the diner is much sweeter, and I guess the honey mustard I have in the house has a different taste. Either way, it was good, and something we'll keep around for sure.

It takes about 40 minutes total to make.

Ingredients:
8 skin-on, bone in chicken thighs (2 to 2.5 pounds)
salt to taste
pepper to taste
2 tablespoons olive oil
1 large onion cut into chunks
2 cooking apples (ex: Cortland), cut into chunks
1 cup low sodium chicken broth
2 to 3 tablespoons honey mustard
1 1/2 teaspoons unsalted butter, softened
1 tablespoon flour
1 to 2 tablespoons roughly chopped fresh parsley

** Stay tuned below for ALL the changes I made to the ingredients!!

Directions:
Preheat oven to 450 degrees F.

Season the chicken with salt and pepper to taste. Heat olive oil in large ovenproof skillet over medium-high heat.

Working in batches if necessary, add the chicken skin side down and cook until golden, about 6 minutes. Flip and cook 2-3 more minutes, then transfer to plate. Pour off all but 2 tablespoons of the drippings.


Add the onion and apples to the skillet and lightly season with salt and pepper. Cook until slightly softened, about 4 minutes.


Mix the broth with the mustard, then add to the skillet and bring to a boil Arrange the chicken, skin side up, in the skillet.


Transfer to the oven and roast until chicken is cooked through - about 15-20 minutes.


Mix the butter and flour to form a paste.

Use a slotted spoon to transfer the chicken, apples and onion to a plate and bring the pan juices to a simmer. Whisk in about half of the butter-flour mixture and boil to thicken, 2 minutes. Continue to cook, adding more of the butter-flour mixture as needed to make a slightly thick gravy. Season with salt and pepper.

Pour over chicken and sprinkle with parsley.


Now, that sounds good, right? Well, we are not the biggest fans of chicken thighs so we actually just used boneless chicken breasts. They obviously cooked a lot faster in the skillet and we only left them in the oven for maybe 10 minutes at the most - our chicken breasts were thin sliced. Tasted good to us!

We also used Macintosh apples, mostly because they were incredibly on sale today at the store. I also halved the recipe, which was pretty easy to do.

Oh, and be careful when taking the skillet out of the oven. I used a pot holder to take it out, and then promptly touched the handle like, 2 minutes later to stir something! Ouch! Needless to say I have a little blister on one finger now. And to make matters worse, I did it another time too.. guess I didn't learn!

It was a very tasty dinner and we had a side of rice.

Give it a shot!

Sunday, August 22, 2010

Stuffed Chicken Breasts with Wine Sauce!


And I am back on the bandwagon!! After a few baking mishaps that left me disappointed in my work, I successfully cooked dinner for my husband and I that tasted amazing. I am so proud of it!!

At first I didn't know what to make and I posted my dilemma on my Facebook page (Eating With A). Someone suggested these wonderful sounding Chipotle Chicken Rolls and I am excited to try them but since I don't eat spicy food that often, I think I will save that recipe for the next time we host a party so I can try a little but not waste the food if it is too spicy for me.

So I thought and thought and searched the Internet for ANYTHING to inspire me. I knew I had to use chicken...we have so much in the house right now. So after reading about 100 recipes, I finally came up with a mish-mosh of ideas and went downstairs to test it out...

I came up with chicken breasts stuffed with ricotta cheese, spinach, Parmesan cheese and chopped black olives and topped with a wine sauce. Here are the ingredients and directions:

Ingredients:
6 large boneless skinless chicken breasts, 1/4 inch thick
1/2 cup thawed and drained frozen spinach
1/2 cup ricotta cheese
1/4 cup Parmesan cheese
1/4 cup black olives, chopped finely (optional)
salt and pepper to taste
1 large egg

For Sauce:
1 tablespoon butter
1 tablespoon flour
1/4 cup white wine (and another 1/8 cup white wine)
1/2 cup chicken broth (and another 1/4 cup chicken broth)

Steps:
I found making the stuffing for the chicken breasts first was the easiest...in a bowl, I mixed the ricotta cheese and Parmesan cheese, then mixed in the spinach and olives until well combined. Then in a separate bowl I whisked the egg and slowly poured it into the cheese mixture and mixed until completely absorbed into the mixture. After that, I sprinkled some salt and pepper into the mixture and stirred it in for a little extra taste.


Then I got the chicken and laid it on a plate. In the middle of each chicken breast, I spread the stuffing. Then I did the best I could to roll it up so the stuffing stayed inside. I solidified the rolled chicken with some toothpicks.

After all chicken was rolled, I put some olive oil in a skillet and put the chicken rolls inside. After cooking them on each side for 2 minutes, I lowered the heat and covered the skillet, letting it sit for 5-7 minutes to cook through. Then I took the chicken off the heat.


Now it was time for the wine sauce! In a large sauce pan, I put the butter and flour in and cooked that for a minute. I then whisked in 1/4 cup of wine until well blended, and then the remaining 1/8 cup of wine. I then let that reduce for a minute. Then I whisked in 1/2 cup of chicken broth and stirred until completely absorbed - then the remaining 1/4 cup broth.

I reduced the heat and put the chicken rolls into the wine sauce and let it simmer for about 7-10 minutes.


When ready to serve, remove the toothpicks and enjoy!!

This sounds complicated but it wasn't...the hardest part was learning to roll the chicken.

And the wine sauce is SO good that I can see using this on various chicken or fish dishes. It's simple to make and tastes so good!!

Try it out for yourself and see :-)

Friday, August 6, 2010

From Citrusy Chicken to Sweet n Sour Chicken!


So, two days ago I talked about how I made a Citrusy Chicken and my husband really enjoyed it but I thought it was just so-so and had too much of a citrus bite for me. Well, we had leftovers from that dinner and since I hate wasting food, I knew I had to do something to make it more palatable for me.

It is amazing what a little apricot preserves, grape jelly and soy sauce can do to chicken that was smothered in pineapple and lemon juice. I put those 3 ingredients in a skillet along with the pineapple/nut mixture that had been topping the other chicken and let it all simmer over a low heat until they melted together.

I tasted the new sauce and it was wonderful!! It was more of a sweet n sour combination, using the tartness from the pineapple and lemon and the sweetness from the apricot preserves and grape jelly. I loved it.

I then put the 2 remaining pieces of chicken in the skillet and let it heat through, flipping them over occasionally so both sides were cooked in the new sauce.


I served it with a side of sweet corn niblets and my husband approved of the new and improved version of the tropical-like chicken I had made. He, of course, liked the first version, but enjoyed this one as well.

Now I just have to amend the first recipe to combine the three new ingredients and I should have one pretty tasty dish!! Experimenting is fun, when it tastes good!

Wednesday, August 4, 2010

Citrusy Chicken


The following recipe is actually an Eating With A original. I had leftover crushed pineapple in my fridge that would go bad if I didn't use it. I HATE wasting food so I searched the Internet for recipes containing pineapple and chicken.

I found this recipe on Allrecipes.com and felt it was an easy enough recipe to mold into something of my own.

Here is what I used:

4 boneless chicken breasts
3/4 can crushed pineapple
splash of lime juice
1/4 cup lemon juice
1/4 teaspoon ground cloves
flour for dredging
salt, pepper, paprika and ground mustard in the flour for taste
cooking oil
chopped red bell pepper
chopped scallions
slivered almonds
cashews

I followed the directions of the other recipe...

1. In a bowl, combine pineapple, lime juice, lemon juice and cloves.

2. Pound chicken to 1/4 inch thickness and add to marinade.

3. Refrigerate for at least a half hour, can be left overnight if you want to cut your time in half when making this recipe.

4. Drain, reserving marinade.

5. Combine flour with all the spice/salt/etc. you want to use and dredge chicken.

6. In a skillet, add oil, scallions and bell pepper. Place chicken in skillet and brown lightly on both sides. Put everything in skillet in shallow baking dish.


7. Add reserved marinade to skillet and cook til hot and bubbly - pour over chicken.

8. Sprinkle nuts on top and bake uncovered at 400 F for 20 minutes.


The results of my concoction were mixed - my husband thought it was delicious and I thought it was too citrusy. Citrus foods sometimes bother my stomach so I wasn't a happy camper eating dinner, but my husband was. (I served it with my Creamy Mashed Cauliflower so that made me happy!)

I feel I put in too much pineapple and lemon juice and it needs something else to cut the citrus. What, I am not sure yet.

I also want to season the chicken a little more so it has some more flavor.

We have another dinner from what I made so I am going to try and take the leftovers and see if I can rework them into something with a little less of a citrus bite. Hopefully I can!!

My husband, however, wants me to just improve upon this exact recipe and keep it. We'll see, we'll see.

Thursday, July 29, 2010

My First Cooking Success


I'm going to bring you back to the first meal I felt I cooked successfully. I'm talking about my mini chicken pot pies - and this is what I once cooked for me and my old roommate Laurie.

Laurie was my second roommate out of college. When I lived with my first, in a different apartment, I was still eating mostly boxed foods like PastaRoni, Macaroni and Cheese or frozen meals. In fact, I was dubbed "carb queen" at work because my leftovers usually consisted of leftover PastaRoni or something like that. But when I moved in with Laurie I started doing a little bit more. Not much - there was still a lot of cereal to be eaten, frozen meals in the freezer and easy mixes to make. But I remember using one of her cookbooks and making chicken finger parm. Hey - it was a start! Haha.

Well, something compelled me to make mini chicken pot pies. I don't even know how I found the recipe, but I made them. Here are the ingredients:
1 package of Pepperidge Farm Puff Pastry shells
1 tablespoon vegetable oil
Some chopped onion (to taste - whatever you like)
1 can low fat cream of chicken soup
1/2 cup milk
1 10 ounce package of frozen vegetables - whatever mix you like, but try to go for tiny cuts
2 cups cooked cubed chicken

First, cook the package of puff pastry shells.... or just a few. I usually make about 6 out of the 10 because that's all we eat immediately. I freeze whatever amount of the filling is left to use another week. Or, I put the leftover filling in the fridge and eat it over white rice - it's really yummy!!

Heat the oil in a large skillet over medium-high heat. Add the onion and cook until tender.

Stir the soup, milk and frozen vegetables in the skillet and heat to a boil. Reduce the heat to low. Cover and cook for 5 minutes or until the vegetables are tender. Add the chicken and cook until the mixture is hot and bubbling.

Spoon the chicken mixture into the pastry shells.

I usually make rice (used to be white but now have migrated toward brown) on the side since I load my shells up with veggies. Sometimes I make stuffing. (In the picture, I have stuffing on the plate)

The whole process takes about 40 minutes but it's really good. I've also used Puff Pastry Sheets lately if I didn't have shells in the house. To do this, I let them thaw and cut them into squares that I mold into muffin baking sheets. Then I put the filling in the cups and fold the edges of the pasty sheets up to they meet on top and tuck everything in as best I can. It's a little trickier to do it this way but it will work.
If I do use the pasty sheets I also make an egg wash to brush over the top to hold it together better.

Anyway, so Laurie dubbed my meal good and I even made it for another friend who is a total foodie. He seemed to enjoy it but maybe he was just being polite because he had a crush on me. Who knows!

Enjoy!