Monday, November 7, 2011

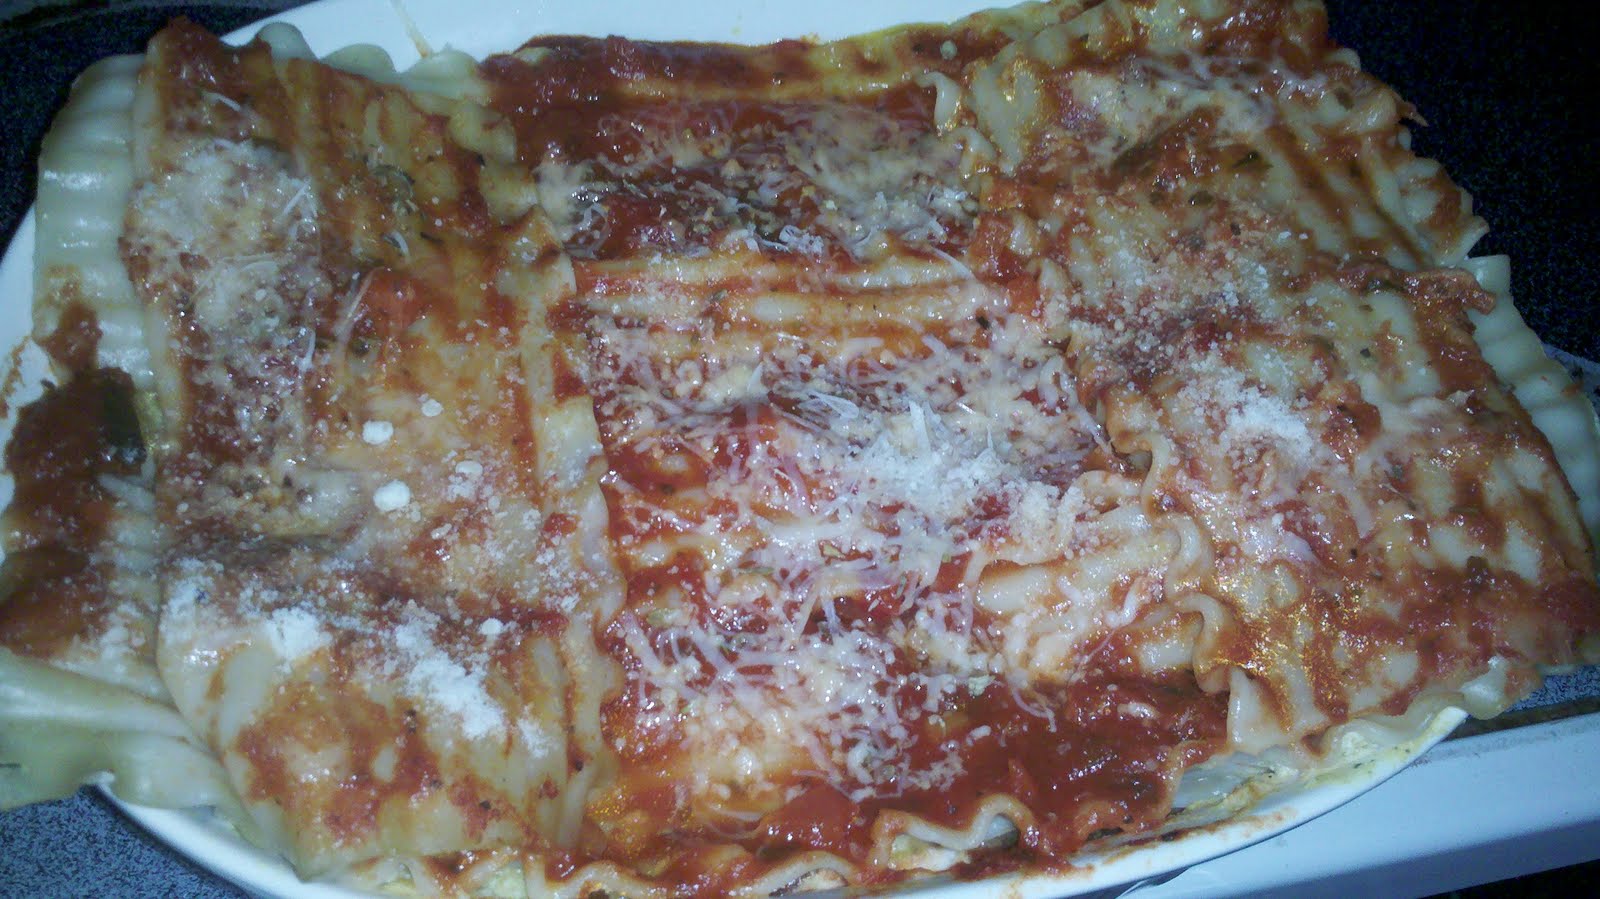
Spinach and Artichoke Lasagna Roll-Ups


After my first lasagna ever, the butternut squash lasagna, that I made last week, I had a bunch of leftover lasagna noodles. I cooked the whole box, not knowing what I would need. So I knew that I would be making another lasagna before they went bad.

I stumbled across the website, Beth's Journey, while searching for spinach & artichoke lasagna recipes. I was looking for one that would use red sauce - I didn't really feel like going to buy a creamy Alfredo type sauce and that is what most of the recipes used. But this girl Beth, she used red sauce, and her post about these little roll-ups was so cute! Read it here!

I sent the recipe to my husband and we decided we would try them. At first, I was just going to make a simple spinach and pepperoni lasagna, but these looked more interesting and the pepperoni could be used another time. So I set about making them.

I did make some changes - as the original poster recommended, I used the sauce from the get-go. I also chopped up the spinach, artichoke hearts and cheese in my blender instead of just hand mixing them. I also added some oregano and crushed red pepper for some extra taste, since my husband and I tend to like things a little more seasoned. I also didn't tie the bundles together with a scallion string as she did, so I will omit that from the recipe I post below, and add the things I used. Please see the link above for the original recipe. I also added some Parmesan cheese, because I can't eat anything Italian without Parmesan!!

The recipe turned out well! My husband really enjoyed dinner and it was a good way to use up the rest of the noodles and ricotta cheese we had in the house from the butternut squash lasagna.

This was also pretty easy to make. I didn't have to take time cooking the noodles since I had already made them last week, I just gently soaked them in water to loosen them up. Blending the ingredients only took a few minutes and the assembly was a snap. It probably took me no more than 25 minutes to put these together and then about 25 minutes in the oven.

We also have some leftovers, so at least I know we have another dinner this week! Yum!

Here is the recipe! (My version - I didn't really use measurements)

Ingredients:

lasagna noodles
about 1/2 cup part-skim ricotta
about 1/2 cup thawed chopped spinach
frozen artichoke hearts, chopped (not sure how many I used, a handful)
garlic powder (to taste)
marinara sauce
a sprinkle of light shredded mozzarella
a sprinkle of shredded Parmesan
oregano
crushed red pepper


Directions:

Preheat your oven to 350ยบ F.

(If you have to cook your noodles, put a pot of water up and cook them for the minimum recommended cooking time)

Combine ricotta, spinach, artichoke, and garlic powder for filling. You can either hand chop everything, or mix it in a food processor or blender. I chose the latter for the quickest way to get this going. (I may have added a dash of oregano to the mixture after I blended it and decided it needed a tad more taste).


Once noodles are cooked, lay them out and sprinkle a tiny amount of crushed red pepper on the noodle, then evenly divide filling and place 2 inches from the bottom of each noodle.


Fold bottom of noodle up over filling and then roll the rest of the noodle around the filling, placing seam side down. Repeat for all noodles you are using.

Place bundles in a greased Pyrex or whatever vessel you are cooking them in. I also coated the bottom of the Pyrex dish with a layer of sauce.


After the bundles are in the dish, cover evenly with more sauce, oregano, shredded Parmesan and shredded mozzarella.


Bake for 25 minutes until cheese is melted and starting to brown.


Serve hot and enjoy!

Sunday, November 6, 2011

Game Day Snack Week 9 - Sweet Potato Biscuits (a Paula Deen recipe)


My November Food Network Magazine was FULL of yummy things that I want to try. But one stood out for a game day recipe and that was Paula Deen's Fluffy Sweet Potato Biscuits.

I love sweet potatoes, and I love biscuits, and biscuits can easily be a fantastic game day snack. You can eat them plain, you can put spreads on them or you can dip them in things like flavored dip or chili.

The recipe was relatively easy. It took me about 40 minutes from start to finish, and I only had a little trouble at the end working with the dough (as usual, doughy products usually are my downfall but I succeeded today, just had a bit of trouble). And the only other "issue" was that for some reason, I do not have a round cookie cutter. I could have used a glass to form the biscuits, but decided to use my Star of David cookie cutter instead. Hey - it worked and now we have fun star-shaped biscuits!

The biscuits turned out delicious and my husband and I both really enjoyed them. Part of me wonders if I used too much milk (I think I did, if I didn't second guess myself at one point I think my biscuits would have been a tad fluffier).

All in all, we were excited to eat these today (in addition to my husband's favorite game day creation from last season, the Pepperoni Cheese Fries), and we are excited to eat the extra biscuits with dinner this week.

I could also see making these for Thanksgiving!

I am happy to say this recipe was a success after last week's meringue disaster...

And now... the recipe (from FoodNetwork.com). I did not alter this in any way but next time I might just to add my own spin :-)

Ingredients:

3/4 cup cooked mashed sweet potato (about 1 large sweet potato)
1/3 to 1/2 cup whole milk, as needed
1 1/2 cups all-purpose flour, plus more for dusting
2 tablespoons sugar
1 tablespoon baking powder
1 teaspoon salt
6 tablespoons cold unsalted butter, cut into small bits


Directions:

Place a rack in the center of the oven and preheat to 425 degrees F. Grease a baking sheet (with butter, oil or cooking spray).

In a small bowl, whisk together the sweet potato and 1/3 cup milk. Set aside.

In a large bowl, whisk together the flour, sugar, baking powder and salt. Cut in the butter with your hands, a pastry blender or two knives until the mixture resembles coarse meal.

Add the sweet potato mixture and fold gently to combine.

Add the remaining milk a little at a time until all the flour is moistened. The amount of milk you will need will depend on the moisture of the sweet potato. (This is where I second guessed myself. I poured in some of the remaining milk and mixed and wondered if I needed more. Thinking back, I think I shouldn't have poured the rest in...oh well!)

Sprinkle a small handful of flour on a work surface. Turn the dough out onto the surface and knead lightly 2 to 3 times with the palm of your hand until the mixture comes together. (This was the only part that gave me trouble because I suck at working with dough. At least the recipe turned out okay!)

Pat the dough out into a 1/2-inch-thick round.

Using a 2 1/2-inch-round biscuit cutter, cut the dough into biscuits. (Or Jewish Stars, haha!)

Gently re-roll the scraps and cut out more biscuits.

Place the biscuits on the prepared baking sheet and bake until light golden brown and firm to the touch, 12 to 14 minutes.

Serve these fluffy biscuits warm or at room temperature.

Enjoy!!

Wednesday, November 2, 2011

Roasted Butternut Squash Lasagna - My FIRST Lasagna ever!


I didn't think I liked butternut squash. I don't like green or yellow squash so why would I? But when my husband and I were in Las Vegas last week, one of the buffets had butternut squash ravioli and I decided to try it. Guess what? It was delicious!

So this past weekend, when my husband and I were food shopping, one of the grocery stores had butternut squash on sale for 49 cents a pound. Despite our goal for the month of November to not spend much on groceries and finally clear out all of our cabinets from the stockpiles of food we have, we decided to go ahead and purchase a small butternut squash, lasagna noodles (I really wanted to make ravioli but I couldn't find wrappers for those) and a small container of ricotta cheese that luckily, was on sale.

I had my goal for Wednesday, the day I was off work. Make my very first lasagna ever. And a butternut squash one at that! I am glad I did it on a day off too...while easy, the recipe took time with all the oven time needed and it is not something that can easily be done after work.

I started my task around 2:30 pm. I didn't follow a true recipe (which I am super proud of because this is MY creation!) but I did look up briefly just how to form the lasagna and how to roast the butternut squash to make a puree.

I wanted to use a butternut squash puree instead of chunks of cut up butternut squash because I was trying to recreate the ravioli from Las Vegas.

So, I started. First I halved the butternut squash and scooped out the little area of its "guts." I fed my gerbils some of the butternut squash seeds and they went bonkers so I ended up saving most of the seeds, washing and drying them, and putting them in a baggie so they have some special treats for a little while.

Then I put the squash halves on a baking sheet with a little water and put it in a pre-heated oven at 350 degrees F for 45 minutes, until the squash was fork tender.

Then I scooped it out of the skin and put it in a blender with a blend of spices/seasonings (which I will write about below).

After that was ready, I started to assemble my lasagna. I can say it wasn't the prettiest lasagna ever made, but it was my first and I was darn proud of it. And my butternut squash puree came out pretty darn tasty if I say so myself!

I know the recipe was a success because my husband gobbled it up in no time. The one change we can both agree on for next time is maybe only using one layer of ricotta cheese instead of two because it overshadowed the butternut squash just slightly, but we could still very much taste the squash as well. But for a more stand alone butternut squash taste, I will probably use just one layer of cheese and two layers of the squash next time.

Now that I know I can make a lasagna, I just have to work on how to use the noodles for efficiently to make it look a little nicer. I got the taste part down!

And now, the recipe...

Ingredients:

1 butternut squash
ricotta cheese
lasagna noodles
marinara sauce (whatever is your fancy, store bought, homemade, whatever!)
garlic powder
salt
pepper
nutmeg
dried parsley flakes
oregano
Parmesan cheese


Directions:

Pre-heat the oven to 350 degrees F.

Half the butternut squash and scoop out the "guts" and seeds. Place the squash halves face down on a baking sheet and pour some water on the tray.

Roast for about 45 minutes or until fork tender.

** While this was going on, I had to cook my lasagna noodles because I did not buy the no boil kind. If you have the kind you need to cook, do this while the squash is roasting, drain and set to the side.

When tender, scoop the squash out of its skin and into a blender. I also added salt and pepper to taste , garlic powder to taste and a tiny pinch of nutmeg (no more than 1/8 teaspoon). I pureed the mixture for 20 seconds, then added some dried parsley flakes and pureed it until all mixed together and smooth.


Pre-heat the oven to 375 degrees F.

Take whatever dish you are using to cook the lasagna in and put some sauce on the bottom. Put a layer of noodles on top of the sauce and then a layer of ricotta cheese and a layer of the butternut squash puree on top of the cheese. Follow with a small amount of sauce and a light sprinkling of oregano.

Add another layer of noodles, cheese and butternut squash. You can either stop with that layer or add a third. (Note, I only used oregano after my first layer, none of the others until I was finishing off the top).


Once finished layering, add your final topping of noodles and cover with sauce, a light sprinkling of oregano and a light layer of shredded Parmesan cheese.


Bake covered at 375 degrees F for 25 minutes, then remove cover and bake uncovered for about a half hour.

Serve hot and enjoy!!


**
If you want to make this to freeze, prepare it and do not bake it - freeze it after it is assembled. This can last for about 2 months. When ready to cook, thaw for 24 hours and bake as directed above.

Like Tapas? Try Julian Serrano at the Aria in Las Vegas!


Back in July, I wrote about a local Tapas restaurant near where my husband and I live that we really enjoyed.

But last week, when my husband and I took a quick jaunt to Las Vegas, we ate at an AMAZING Tapas restaurant in the Aria hotel called Julian Serrano. It was seriously delicious and it is a good thing we live across the country from there or else we'd be gaining a ton of weight monthly eating there.

Of course we looked at the menu before heading to Las Vegas, and we already knew we would be ordering my husbands favorite, which is Brava Potatoes, served with a spicy tomato and alioli sauce. It was a tad TOO spicy for me but overall, delicious. My husband loved it.


We also knew we'd be getting one of my favorites, traditional Spanish chicken croquetas. There was a béchamel in the croquettes which made them very creamy. They were delicious, but the ones I had while in Barcelona weren't AS creamy and I liked them a little better that way. I am such a croquette fan.


The last thing we KNEW we would order when at the restaurant was another favorite we discovered in Spain - Churros!! MMM...Churros served with chocolate. The difference between the thick chocolate that came with these churros and the chocolate served in Spain, is that this restaurant makes it spicy by adding paprika into the chocolate. It's not super spicy, or else I wouldn't be able to eat it, but it is enough to warm your throat. It was pretty good! Also, the churros here came lightly dusted with powdered sugar while the churros in Spain are coated with regular thick sugar granules. But we ate every last bite of these churros.


We needed some other plates to share, so we also ordered a Spanish tortilla, which was potatoes, eggs and onions. It was more potato to me than any egg, so I asked my husband to try it since he hates eggs and of course he swore it was too eggy (it wasn't). And once again, this plate did not disappoint.


We also ordered the Grilled Angus Flat Iron Steak which came with Japanese eggplant and a mushroom demi. This was one of our favorites for the night - seriously tasty and probably one of our top recommendations for anyone going to eat here.


Lastly, in addition to our churros with dessert, we ordered something called buñuelos, which are Spanish doughnuts served with a butterscotch caramel sauce. OMG, these were SO FRIGGIN GOOD. We were so full, but managed to also eat every single little doughnut. We couldn't leave anything behind!


The website suggests reservations, which we made, but we were seeing a 7:00 p.m. show at the Aria so we were eating relatively early. We made reservations for 5:30 p.m., but showed up around 5:00 p.m. on a Tuesday night and they had plenty of room to accommodate us early. More people came the longer we sat there and we left a little after 6:00 p.m. The service was fantastic - our waitress was so nice and answered every question we had and even just talked to us about our experiences in Spain a little.

The prices are definitely reasonable, unless you are like the table of 4 business colleagues next to us who ordered at least 20 or more plates. I kid you not...my husband and I were cracking up because they just kept bringing out more and more. And at one point, one man asked "is this it?" and another man answered, "let's get through this and then we'll see!" HAHAH! I wish I was dining on their tab!

It's also casual since the restaurant is open to the lobby of the hotel. We had a fantastic time and hope that whenever we get back to Las Vegas, it is still there. In the meantime, anyone in the Vegas area or visiting the city of sin should definitely check it out.

Enjoy!

Sunday, October 30, 2011

Guest Post - Pumpkin Raisin Drop Cookies!


Eating With A readers: My cousin-in-law Melissa recently graduated college and moved all the way across the country to start her new life. I got her started on couponing and now she is kicking my butt and doing it much better than me!

She also has been cooking for herself, so I told her that any time she wanted to send me posts, she can guest write. This is her debut on Eating With A. Everything below this paragraph is her words. Enjoy!


PUMPKIN RAISIN DROPS

I got this recipe from my aunt, who got it from a healthy foods, low-fat cookbook. Keep in mind that these come out cake-like, not like cookies.

I love this for a fall treat! Halloween, Thanksgiving, a random weekday - SO GOOD. I've been making these a few times every fall for a couple of years. They're always a hit with friends and co-workers!

If you aren't a fan of raisins, like me, leave them out!


Ingredients:

1 beaten egg (I use egg-beaters)
3/4 cup canned pumpkin (meaning plain, canned pumpkin -- NOT pumpkin pie filling, which has lots of things added to the pumpkin)
1/3 cup brown sugar
1 tablespoon cooking oil
1 teaspoon vanilla
3/4 cup all-purpose flour
1 teaspoon pumpkin pie spice
1/4 teaspoon baking soda
1/8 teaspoon salt
1/4 cup raisins (I don't use these)
Non-stick spray coating


Directions:

1. In a medium mixing bowl, stir together egg, pumpkin, brown sugar, oil, and vanilla.

2. In a small mixing bowl, stir together flour, pumpkin pie spice, baking soda, and salt. Add dry ingredients to pumpkin mixture. Stir in raisins.

3. Spray a baking sheet with nonstick spray coating. Drop the dough by rounded teaspoonsful, 1 inch apart, onto the cookie sheet.

4. Bake in a 350-degree oven for 12-14 minutes or until done. Cool on a wire rack. Makes 24 cookies.


Keep in mind that the standard size jar of Libby's Pumpkin (approx 29oz) will make you 4 or 5 batches of these cookies. Also, even though the "raw" batter looks like baby food and smells less than fantastic, don't let this deter you!


Yes, I know the final product looks a little...gross. But these "cookies" are so spongey and moist, I guarantee that if you like pumpkin, you'll like these cookies.


FYI, as we gradually eat them over the next few days after baking, we usually put them in a toaster oven before serving, so they are hot and slightly browned.

Game Day Snack Week 8 (part 2) - Caramelized Banana "Sundae"


Since MY idea for the Sunday game day snack went bust (see my "ghost meringues" and LAUGH here!), my husband decided to make his own snack for game day.

I think the Viva Elvis Cirque du Soleil that we just saw in Vegas got into his head, because he decided to do a play on peanut butter and bananas.

We had one banana left in our fruit basket, so he decided to slice it up and caramelize the bananas in brown sugar.

First he sliced them, then he rolled each slice in the brown sugar to coat them, and then he sauteed them in a pan with a tiny drop of margarine.


After the bananas were done, he put them into a bowl and added peanuts for texture, chocolate syrup and whipped cream.

Different, but tasty, and he enjoyed it while parked on the couch watching the Giants.

This concoction can also be put over ice cream! (Vanilla would probably work best).

Enjoy!

Game Day Snack Week 8 - Halloween Treat! Ghastly Meringues


Today's recipe was a borderline disaster. I found this recipe for Ghastly Meringues in my Food Network Magazine and they were so cute I just HAD to try them.

Well, for anyone who doesn't know how to make meringues and has never tried them before...this may not be the best recipe to try for the first time on the day you want to make them.

I recruited my husband for help. The recipe seemed simple enough...beat egg whites, cream of tartar and sugar together until stiff. Well, either the beating needs to be for more than the recommended 5-6 minutes or else my husband and I just fail at this task.

We actually made two batches. The first batch I actually used egg whites and the mixture just wouldn't get stiff enough and turned into a runny mess.

The second time, I had Meringue powder made by Wilton and you can use it as an egg white substitute. So I did.


It seemed to work better from the start, but when I tried piping the mixture onto the way paper, it didn't stay in stiff peaks and ended up in blobs. I hoped it would rise in the oven. (It didn't).

My end result ended up meringue cookies. They tasted great, just not in the shape I wanted!! OOPS!!

I would say this is a dessert that only people who have a lot of time to perfect it try, or people who already know how to make a meringue. Otherwise it is a super cute and tasty treat for a game day around Halloween, or for a Halloween party!

Here is the recipe: (total time, 1 hour 35 minutes. 35 minutes active time, 1 hour baking).

Ingredients:

3 large egg whites
1/2 teaspoon cream of tartar
3/4 cup sugar
1/2 cup semisweet chocolate chips

Directions:

Preheat the oven to 200 degrees F.

Line a baking sheet with parchment paper.

Beat the egg whites and cream of tartar in a large bowl with a mixer on medium speed until frothy.

Beat in the sugar; increase the mixer speed to high and beat until stiff peaks form, 5 to 6 minutes.

Transfer to a pastry bag fitted with a large round tip. Pipe 8 to 10 swirls on the prepared baking sheet.

Bake until dry, 1 hour to 1 hour, 15 minutes. Transfer the baking sheet to a rack and let cool completely.

Put the chocolate chips in a microwave-safe bowl; microwave on 50 percent power until melted, about 1 minute, stirring halfway.

Transfer the melted chocolate to a zip-top bag and snip a corner. Pipe the chocolate on the meringues to look like eyes.


This recipe was classified as easy, but I obviously do not have talent enough for this. Oh well - chalk it up to the fact that I am still NOT the best baker and am better at cooking dinner recipes.

It's still a cute recipe and seems easy so good luck to all who try it out!

Stay tuned either later or tomorrow for a special guest post by my cousin-in-law, Melissa!! She made a special pumpkin treat.


** Top Photograph courtesy of Raymond Hom on Food Network website. It does not belong to me. (I just wanted a picture of how the treats were supposed to look!)

Here is what my crappy "ghosts" ended up like!! :-)